 Creating a Parking AreaCreating a Parking Area
To create a parking area:
Select the Parking Area tool from the Site Planning tool set.
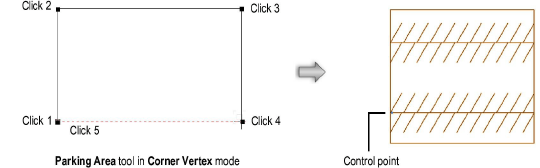
Click to begin drawing the parking polyline; click to set each polyline vertex. Click again back at the start point (or press K) to complete a closed polyline, or double-click to create an open polyline. For more information on polylines, see Polyline Tool.
The first time you use the tool in a file, a properties dialog box opens. Set the default properties, and click OK. The properties can be edited from the Object Info palette.
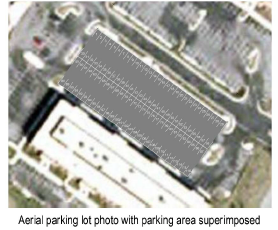
The parking spaces are automatically created within the area defined by the polyline.
Once created, the parking area can be edited by several methods.
● Adjust the parking space origin by dragging the parking area control point.
● Reshape the parking area polyline with the Reshape tool.
● Set a solid fill color for the parking area and a solid pen color for the space numbers through the Attributes palette.
● Change the parking space numbering font, size, and style with the Text menu, or assign a text style.
● The parking area displays in a 3D view; if desired, assign a texture to the parking area with the Render tab of the Object Info palette (Renderworks required).
Parking area parameters can be edited from the Object Info palette.
Click to show/hide the parameters.
~~~~~~~~~~~~~~~~~~~~~~~~~
![]()