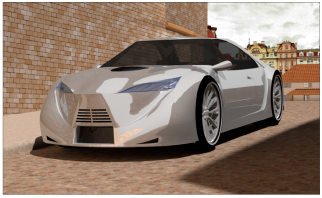
Rendering gives a solid appearance to 3D objects. Solid objects can cast shadows and occlude (hide) objects that are behind them.
The Vectorworks Fundamentals product provides a quick rendering solution using OpenGL (see Rendering with Vectorworks). OpenGL performs lighting calculations for fast, interactive rendering and medium-quality render previews, but it cannot create reflections. For final-quality output, use the Renderworks product; it provides additional light sources, and it can cast shadows, create reflections, add indirect lighting effects and camera effects, and produce much better rendering results through intensive lighting calculations and soft effects. Render settings can be saved as a Renderworks style for re-use, and styles can be shared among files. The Renderworks product includes the Visualization palette for easily accessing all lights and cameras in the file. Another benefit of using the Renderworks product is that an image can be rendered in any mode from a specified portion of the drawing.
Rendering is often a memory-intensive and time-consuming process. A progress bar at the bottom of the drawing window shows the time required to process a rendering in Renderworks, Hidden Line, and Polygon render modes, allowing you to compare render times for different render settings and hardware. Modify your model and change rendering options in these ways to increase rendering performance and speed:
● Use the highest-level geometry possible to model your objects. It is much better to model an object as an extrude, sweep, Boolean solid, or a NURBS surface than as a mesh or a set of 3D polygons. For extrude and sweep profiles, use polylines, and do not use a sweep segment angle smaller than five degrees. Examine imported geometry for excessive vertices and polygons. The slowest way to model for rendering is to create a detailed object as a set of small, individual 3D polygons.
● Eliminate 3D details that are not significant to the rendered image or the indirect lighting. For example, if you model a staircase's individual bolts and threaded screws, each of these will be contributing unnecessarily to the rendering time. Use classes to hide geometry that is not going to be visible in the rendered view.
● Test rendering settings on sheet layer viewports with lower sheet layer resolution values. With Renderworks, sheet layers can render in the background while you continue working. Sheet layers are set to 72 dpi by default, but for testing, set the dpi value even lower (such as 40). Zoom out of a drawing to reduce the rendered area, or use the Render Bitmap tool (Renderworks required) with a low dpi setting.
● Use sheet layer viewports and render bitmaps for final renders, since they can render in the background (Renderworks render modes only).
● Consider turning off ambient lighting (Ambient Info off in the Lighting Options or set Ambient Light dialog box, and in Renderworks styles) to evaluate the contribution of individual light sources more clearly.
● Change rendering options temporarily to test a rendered look. For OpenGL options, disable Use Anti-Aliasing (Mac only). In the Custom Renderworks options (Renderworks required), set the Quality levels to low and turn Anti-Aliasing, and even Shadows, off. Render with Fast Renderworks to evaluate before switching to Final Quality or Custom Renderworks.
● Shadows add to rendering time. Shadows can be turned off for light objects that do not cast obvious shadows. In Renderworks, individual textures can be set not to cast or receive shadows (Shadows options in the Edit Texture dialog box). A clear glass texture, for example, has very slight shadows and does not cast shadows on other objects. In addition, enable soft shadows only for light sources that create prominent shadows in an image (for example, a directional light that represents the sun).
● Because shadows are an intensive process, first try turning on Ambient Occlusion (in the Lighting Options dialog box, and in Renderworks styles) to see if the perception of depth achieves the desired effect (Renderworks required).
● When using indirect lighting (Renderworks required), use the fewest number of bounces needed (as specified in the Lighting Options dialog box) and adjust the quality in the Final Quality or Custom Renderworks settings. Individual textures can have their own indirect lighting setting overrides to reduce the rendering time required; disable indirect lighting for these textures.
● Area and line lights (Renderworks required) contribute significantly to rendering time. Use these light sources sparingly, and adjust the Quality of each in the Object Info palette. Only enable Soft Shadows for these lights if their shadows are prominent in the image.
● Reflective, blurry reflective, blurry transparent, and glow shaders add to rendering time (Renderworks required). Use these effects sparingly. Blurriness is faster at less than 15% and should not be set to more than 40% (for wide, shiny highlights, consider using a plastic or metallic reflectivity shader rather than a blurry reflection). Glowing objects need to be sampled more accurately and therefore, they take more time. Use the glow shader for a few, large objects; use the backlit shader for several small fixtures with simple light sources.
● In Renderworks, glass adds to render times because it has reflective, refractive, and transparent shadow components.
● Very clear glass can be set to not cast shadows in the Edit Texture dialog box to save render time. Indirect lighting can be disabled for glass textures in the Edit Texture dialog box, as well, to save time when calculating indirect lighting.
● For thin panes, like windows, the refractive qualities of glass are not significant, so the index of refraction parameter for the glass can be set to a low value (just above 1).
● Often, buildings use glass with a metallic/mirrored energy efficient coating; in that case, a combination of mirror reflectivity and plain transparency can produce a glass effect that renders faster.
● Glass absorption color can be used for very accurate close-ups of items like glassware, but this effect takes longer to render.
● Blurry (frosted) glass, in particular, can be slow; use blurry glass in a strictly controlled way. Lower blur values render faster.
~~~~~~~~~~~~~~~~~~~~~~~~~
![]()