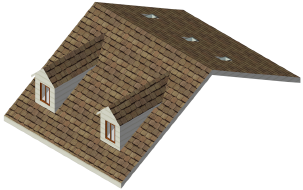

You can create a wide variety of dormer windows in roof objects and roof faces. There are five styles to select from: trapezium, gable, shed, hip, and bat; each gable type has unique parameters. The editing parameters available in the Edit Roof Element dialog box depend on the style of dormer chosen. In the Vectorworks Design Series, a dormer can be set to be the same style as that of the roof style, automatically specifying a uniform appearance for the dormer and roof.
Dormer walls are always drawn in a clockwise direction for easy texture application.
To create a gable dormer window in a roof object or roof face:
In Top/Plan view, select a window symbol from the Resource Browser.
The window must be a symbol, not a plug-in object.
Select Make Active from the Resources menu. The Symbol Insertion tool is automatically activated from the Basic palette.
Alternatively, if the desired symbol is in the current document, another open document, or in a document in Favorites, click the Symbol Insertion tool then select the symbol definition from the Active Symbol Def list on the Tool bar. Select a file on the left to display thumbnails of the symbol definitions available in that location, and select the desired symbol definition.
Click to place the symbol in the roof object or roof face.
The Edit Roof Element dialog box opens.
Click Edit Dormer.
Select the dormer style.
The parameters automatically change according to the selected dormer style, with values for placing the dormer at the location specified with the mouse click.
Click to show/hide the parameters.
Click OK.
The gable dormer with window is created and placed according to the parameters specified. A hole is automatically created in the roof where the dormer walls exist.
Click here for a video tip about this topic (Internet access required).
~~~~~~~~~~~~~~~~~~~~~~~~~
