
The Translate and Rotate mode is the Edit Subdivision tool’s most flexible mode. It is used for several free-form manipulations of the subdivision object.
To translate and rotate a subdivision model:
Select the subdivision object to edit.
Click the Edit Subdivision tool from the 3D Modeling tool set.
Alternatively, double-click the subdivision primitive object with the Selection tool to select the object and automatically activate the Edit Subdivision tool.
Click Transform mode and Translate and Rotate mode from the Tool bar, and click either Align to Cage or Align to Working Plane mode, to ensure proper placement of the 3D dragger.
As you move the cursor over the cage mesh, its edges, faces, and vertices are highlighted to indicate they can be modified.
Click on a cage mesh entity to place the Translate and Rotate 3D dragger. To select multiple cage mesh entities, Shift-click, or Shift-drag to create a marquee selection.
The 3D dragger displays only when a cage mesh entity is selected.
Use Re-position mode if needed to move the 3D dragger to the desired location (see Repositioning the 3D Dragger).
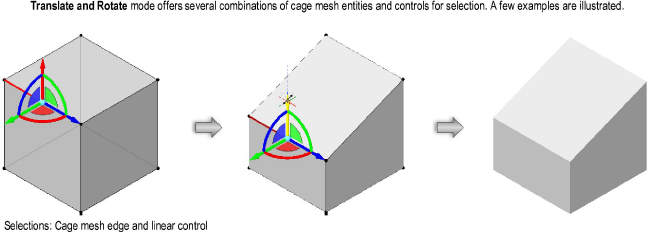
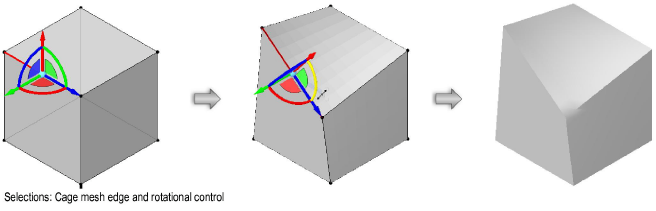
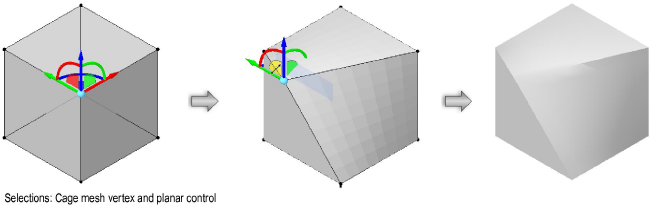
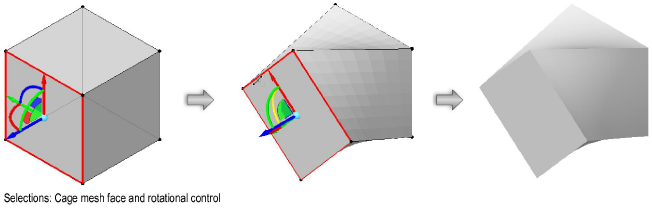
Click on the 3D dragger’s appropriate linear, planar, or rotational control and move the dragger to change the object’s shape. As you move the dragger, the new shape previews.
The selected control displays in yellow during the operation.
Click to complete the transformation.
After the operation is complete, the Edit Subdivision tool and selected cage mesh entity remain active, to facilitate beginning another operation. Click another mode, cage mesh entity, or control to begin another edit.
~~~~~~~~~~~~~~~~~~~~~~~~~
![]()