Applying Image Resources
Image settings are specified through the Attributes palette
and applied to a 2D object through the Resource Manager or the Attributes
palette. In addition, an image fill can be specified as a default class
attribute (see Setting Class Properties). Some objects have the ability to apply image
settings while setting the object attributes.
Applying an Image
from the Attributes Palette
To apply an image resource from the Attributes palette:
Select
the object, and then select Image from the
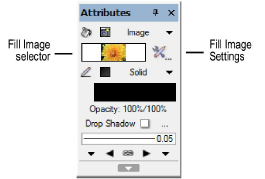
Attributes palette fill list. To change to a different image, click
the Fill Image selector. From the Resource
Selector, double-click a different image to apply it.

Specify
the settings for the current image by clicking the Fill
Image Settings button next to the Fill
Image selector.
The Image Settings dialog box opens.
Click
to show/hide the parameters.
If desired,
click Preview to view the results of the
image settings.
Click
OK to apply the image settings.
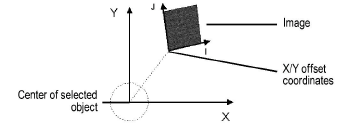
The X and Y axes are file-based, relative
to the center of the selected object. The I and J axes are image-based.

Applying an Image
from the Resource Manager
To apply an image resource from the Resource Manager:
Select
the object.
From
the Resource Manager, right-click (Windows) or Ctrl-click (Mac) on
the resource, and select Apply from
the context menu. Alternatively, double-click on the resource or drag
the resource onto an object to apply it.
The image settings can be edited from the
Attributes palette.
~~~~~~~~~~~~~~~~~~~~~~~~~
Transferring Attributes
Creating Image Resources
Mapping Image Fills
Was
this page helpful?

vectorworks.net


