 Creating NURBS Roadways
Creating NURBS RoadwaysThe Roadway (NURBS) tool uses NURBS curves to define the road shape. However, the Roadway (NURBS) object does not represent accurate alignments of low-speed roadways, which are typically constructed with arcs (constant radius) and tangents (straight lines); use the Roadway (Poly) tool for this.
NURBS roadways can also be created by drawing a polyline or polygon and then selecting the Create Objects from Shapes command (see Creating Objects from Shapes).
Here is a suggested process for creating a NURBS roadway:
● Create the roadway.
● Select the Send to Surface command to set the road to the existing terrain.
● Select Redistribute and Smooth Curve from the Object Info palette of the selected roadway once or twice to smooth out the road slightly, so it does not follow every hill and valley in the existing terrain.
● Manually reshape the road in 3D as required (to match other road elevations, garage elevations, and so on).
● Only select Redistribute Stations for more or fewer station annotations. Fewer stations are easier to work with when sketching and reshaping, but a road construction company might require more stations to be specified. Redistribute Stations is also useful to ensure that the station spacing is equal after reshaping the road.

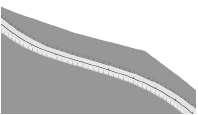
To create a road with the Roadway (NURBS) object:
Click the Roadway (NURBS) tool from the Site Planning tool set.
Multiple roadway tools share the same position on the tool set. Click and hold the mouse on the visible tool to open the Pop-out Tools list and select the desired tool.
The following modes are available.
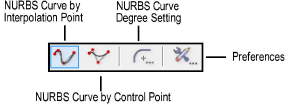
Click in the drawing file to set the start point of the road, and then click to set the position of each additional NURBS vertex. Double-click the last point to complete creation of the roadway (NURBS) object.
The first time you use the tool in a file, a properties dialog box opens. Set the default properties, and click OK. The properties can be edited from the Object Info palette.
► Click to show/hide the parameters.
If necessary, use the Reshape tool to modify the locations of the vertices after object creation, or use the vertex editing controls from the Object Info palette to move the vertices or change the degree of vertices.
Update the site model. Select the site model and click Update from the Object Info palette.
~~~~~~~~~~~~~~~~~~~~~~~~~