 Inserting CabinetsInserting Cabinets
All Vectorworks products include three types of cabinets for inserting in a drawing file—base, wall, and utility cabinets. In the Vectorworks Fundamentals product, the cabinet objects are inserted from an object library through the Resource Browser. In the Vectorworks Design Series products, the cabinet objects are inserted with the various cabinet tools. Cabinet door and drawer handles are provided in libraries; a selected handle is automatically imported into the current file and displays in the Resource Browser; see Resource Libraries.

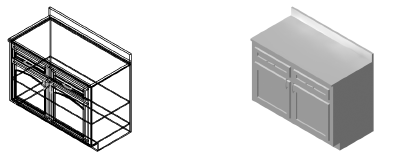
To insert a base cabinet:

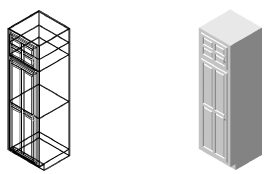
To insert a utility cabinet:

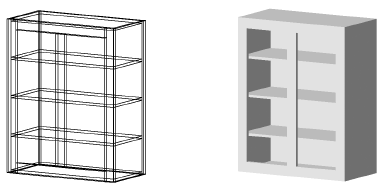
To insert a wall cabinet:
Select the Base Cabinet, Utility Cabinet, or Wall Cabinet tool from the Furn/Fixtures tool set.
Click on the drawing or wall to place the cabinet, and click again to set the rotation.
The first time you use the tool in a file, a properties dialog box opens. Set the default properties, and click OK. The properties can be edited from the Object Info palette.
Click here for a video tip about this topic (Internet access required).
Click to show/hide the parameters.
Parameter |
Description |
Flip |
When inserting a cabinet in a wall, click to flip the cabinet orientation |
Position |
When inserting a cabinet in a wall, click to set the position of the cabinet; in the Position Symbol in Wall dialog box, enter the distance from the symbol’s insertion point to the selected corner of the wall |
Style |
Select the cabinet style |
End Finish |
Select the cabinet finish |
Blind |
Specify the direction of the blind, or none |
Length |
Enter the cabinet length |
Uneven Length Corner |
Select whether the cabinet has an uneven length corner, and if so, enter the left corner length |
Height / Depth |
Enter the cabinet height and depth |
Door mounting |
Select the cabinet door mounting style |
Draw Drawer |
Select whether to draw the cabinet drawers |
Drawer Style |
Specify the drawer style |
Number of Doors |
Select the number of cabinet doors |
Door Style |
Select the cabinet door style |
Panel Style |
Select the door panel style |
Arch Height Factor |
Specify the proportion of the arch height in relation to the door width (a larger value produces a taller arch) |
Door Swing |
Specify the door swing direction |
Rail and Stile Width |
Select the rail and stile width |
Bevel Edge |
Select whether to bevel the outside door and drawer edges |
Bevel Inside |
Select whether to bevel the inside door and drawer edges |
Reveals |
Enter the Top, Mid, Bottom, Side, and Center reveal height or width |
Number of Shelves |
Enter the number of shelves |
Draw Kick |
Select whether to draw a kick |
Kick Height / Depth |
Specify the kick height and depth |
Draw Counter |
Select whether to draw a counter |
Back Splash |
Specify where to place the back splash, or none |
Splash Height |
Enter the back splash height |
Splash Thickness |
Enter the back splash thickness |
Counter Thickness |
Enter the counter thickness |
Overhang |
Enter the counter overhang length |
Reveal |
Enter the thickness for the bottom portion of the counter |
Show Detail |
Select whether to draw various cabinet details |
Cabinet/Doors/Kick/Counter |
To control appearance and visibility, select a class for each component from the list of classes present in the drawing, or create a new class. Select <Base Cabinet Class> to place the component attributes in the same class as the cabinet object. |
Door Handle Height |
Enter the door handle height |
Door / Drawer Handles |
Click Door Handles or Drawer Handles to select a handle from a library or the current file; select a symbol from the graphical list of Symbols and click OK (or select the No Pull symbol to remove the door or drawer handles) |
Click to show/hide the parameters.
Parameter |
Description |
Flip |
When inserting a cabinet in a wall, click to flip the cabinet orientation |
Position |
When inserting a cabinet in a wall, click to set the position of the cabinet; in the Position Symbol in Wall dialog box, enter the distance from the symbol’s insertion point to the selected corner of the wall |
Length |
Enter the cabinet length |
Height / Depth |
Enter the cabinet height and depth |
Door Mounting |
Select the cabinet door mounting style |
Number of doors |
Select the number of cabinet doors |
Door Swing |
Specify the door swing direction |
Door Style |
Select the cabinet door style |
Panel Style |
Select the door panel style |
Mullion Style |
Select the cabinet mullion style, or none |
Handle Height |
Enter the door handle height |
Number of Shelves |
Enter the number of shelves |
Upper Door Height |
Enter the upper cabinet door height |
Upper Door Style |
Select the upper cabinet door style |
Upper Panel Style |
Select the upper cabinet door panel style |
Upper Mullion Style |
Select the upper cabinet mullion style, or none |
Upper Handle Height |
Enter the upper cabinet door handle height |
Upper Number of Shelves |
Enter the number of shelves in the upper cabinet |
Arch Height Factor |
Specify the proportion of the arch height in relation to the door width (a larger value produces a taller arch) |
Rail and Stile Width |
Select the rail and stile width |
Bevel Edge |
Select whether to bevel the outside door and drawer edges |
Bevel Inside |
Select whether to bevel the inside door and drawer edges |
Reveals |
Enter the Top, Mid, Bottom, and Side reveal measurement height or width |
Draw Kick |
Select whether to draw a kick |
Kick Height / Depth |
Specify the kick height and depth |
Show Detail |
Select whether to draw various cabinet details. |
Cabinet/Doors/Kick/Glazing |
To control appearance and visibility, select a class for each component from the list of classes present in the drawing, or create a new class. Select <Utility Cabinet Class> to place the component attributes in the same class as the cabinet object. |
Handles |
Click Handles to select a handle from a library or the current file; select a symbol from the graphical list of Symbols and click OK (or select the No Pull symbol to remove the handles) |
Click to show/hide the parameters.
Parameter |
Description |
Flip |
When inserting a cabinet in a wall, click to flip the cabinet orientation |
Position |
When inserting a cabinet in a wall, click to set the position of the cabinet; in the Position Symbol in Wall dialog box, enter the distance from the symbol’s insertion point to the selected corner of the wall |
Style |
Select the cabinet style |
End Finish |
Select the cabinet finish |
Blind |
Specify the direction of the blind, or none |
Length |
Enter the cabinet length |
Uneven Length Corner |
Select whether the cabinet has an uneven length corner, and if so, enter the Left Corner Length |
Height / Depth |
Enter the cabinet height and depth |
AFF |
Enter the cabinet height above the finished floor |
Door mounting |
Select the cabinet door mounting style |
Number of Doors |
Select the number of cabinet doors |
Door Swing |
Specify the door swing direction |
Door Style |
Select the cabinet door style |
Panel Style |
Select the door panel style |
Mullion Style |
Select the cabinet mullion style, or none |
Number of Shelves |
Enter the number of shelves |
Arch Height Factor |
Specify the proportion of the arch height in relation to the door width (a larger value produces a taller arch) |
Handle Height |
Enter the door handle height |
Rail and Stile Width |
Select the rail and stile width |
Bevel Edge |
Select whether to bevel the outside door and drawer edges |
Bevel Inside |
Select whether to bevel the inside door and drawer edges |
Reveals |
Enter the Top, Bottom, Side, and Center reveal measurement height or width |
Glazing |
Select the glazing class or none |
Show Detail |
Select whether to draw various cabinet details. |
Cabinet/Doors |
To control appearance and visibility, select a class for each component from the list of classes present in the drawing, or create a new class. Select <Wall Cabinet Class> to place the component attributes in the same class as the cabinet object. |
Handles |
Click Handles to select a handle from a library or the current file; select a symbol from the graphical list of Symbols and click OK (or select the No Pull symbol to remove the handles) |
![]()