To modify an object’s image fill:
Click the Attribute Mapping tool from the Basic palette or the Visualization tool set.
Click an object containing an image fill. Only one object at a time can be edited.
An editing object with eight handles is placed over the image.
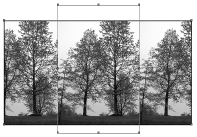
Use the editing object to set the image origin location, i-axis and j-axis lengths, and rotation angle. The fill can also be nudged.
Action |
Description |
|
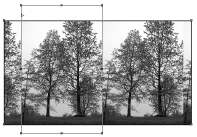
Edit the location of the fill (image origin) |
Click and drag the entire editing object, moving it to the desired location.
|
|
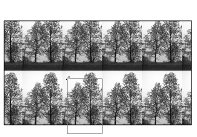
Edit the image i-axis and j-axis location |
Click a corner handle (the resize cursor displays) and drag the handle to the new size; holding the Shift key during this operation constrains the image aspect ratio. Click to set.
|
|
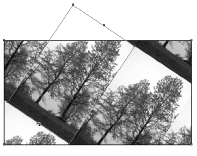
Edit the image rotation |
Click a side handle (the rotate cursor displays) and drag the handle to the new rotation angle (or press the Tab key and enter a Rotation value in the Data bar). Click to set. Press the Ctrl key (Windows) or Command key (Mac) while rotating to rotate about the image center.
|
|
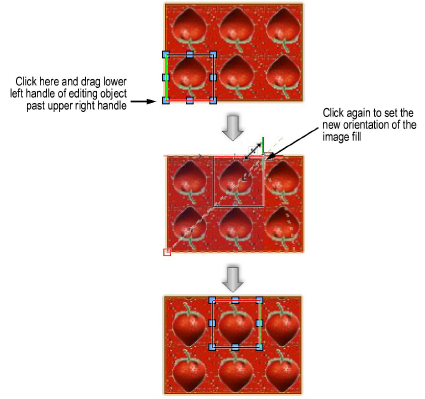
Flip the image horizontally or vertically |
Click and drag a corner of the editing object past another corner of the editing object; click again to redraw the image within the new drawing area. Drag horizontally or vertically to flip the image in that direction; drag diagonally to flip the image both horizontally and vertically. |
Options in the Image Settings dialog box (accessed from the Attributes palette) also affect image attribute mapping. When the link button between the I Length and J Length fields is selected, the image cannot be flipped or mirrored by dragging the editing object’s handles vertically or horizontally; only diagonal dragging is allowed. Use the Flip Horizontally or Flip Vertically options in this dialog box to change the fill image orientation without moving or resizing the image.
~~~~~~~~~~~~~~~~~~~~~~~~~
![]()