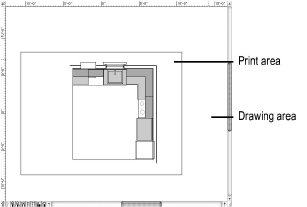
Within the drawing area is a colored border that defines the printable page boundary. Anything within the page boundary is printed and anything outside of the boundary is not printed.
The settings from both the Page Setup and Printer Setup dialog boxes determine the number of sheets of paper (pages) required to print the entire drawing on the selected printer.
This allows you to print or plot the same drawing to multiple devices without readjusting the drawing. For example, if you enter the dimensions of a “D” size sheet of technical paper in the Printable Area of the Page Setup dialog box, and select “Letter” paper size in the Printer Setup dialog box, the program determines that the drawing needs to be “tiled” across 12 sheets of 8-1/2” x 11” paper to a standard laser printer. The number of 8-1/2” x 11” pages required for printing horizontally and vertically are automatically updated in the Page Setup dialog box. To send this same drawing to a plotter, change the settings in the Page Setup dialog box for a plotter, and the program converts the pages required accordingly.
To show or hide the page boundary, use the Show page boundary option on the Page Setup dialog box, or add the Show Page Boundary shortcut to the Tool bar; see Setting Quick Preferences. To change the color of the page boundary, see Configuring Interactive Display.
The page setup (including the printable area) is specified individually for each sheet layer (see Setting Sheet Layer Properties).
~~~~~~~~~~~~~~~~~~~~~~~~~
![]()