Select an unstyled instance of the plug-in object in the drawing area.
Select Tools > Create Plug-in Style.
Alternatively, right-click (Windows) or Ctrl-click (Mac) on the unstyled plug-in object and select New Plug-in Style from Unstyled Plug-in from the context menu.
The Create Symbol dialog box opens.
Select the destination folder for the plug-in object style, and click OK.
The <Object> Style dialog box opens, populated with the parameter values of the selected instance. This dialog box appears identical to the object preferences or settings dialog box that is used to insert and edit the object, with the exception of the settings related to defining a plug-in object style.
Enter the Style Name, which must be unique in the file.
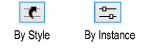
For each parameter, click the By Style/Instance button and toggle to the desired setting.
To set all the parameters on the active pane of the dialog box to By Style or By Instance, click All By Style and toggle to the desired setting; repeat for other panes as necessary.
To import settings from a previously saved style, click Import <Category> Settings; styles from the current file and default content folders are available. Choose the style for import. Settings are imported for the active pane only; repeat for other panes as necessary.
A plug-in object style’s By Style/Instance setting can be established only from the <Object> Style dialog box, not from the object’s settings, preferences, or properties dialog boxes. On the object settings/preferences/properties dialog box, the style/instance icons are for informational purposes only. You can change these settings by Editing Plug-in Object Styles; doing so will alter every object in the file that uses the style, including those already inserted in the drawing.
For style parameters, specify the parameter value; this value is fixed for every object that uses this plug-in object style and cannot be edited from the object’s settings, preferences, or properties dialog box. Instance parameter values set here are the default values for newly placed instances; they can be edited from the object’s settings, preferences, or properties dialog box.
Click OK.