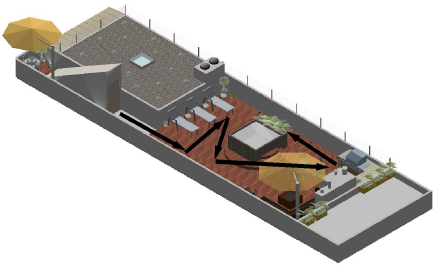
The move along path type of animation moves through a 3D drawing along a specified path. For example, create a walk-through presentation of a house.
To create an animation moving along a specified path:
Set up the drawing view.
Select the desired views from the View menu: Standard Views, Rendering, and Projection.
The drawing Projection must be set to a perspective view.
Save a view for each point along the path to use for creating the animation.
Use the Walkthrough and/or Flyover tools to change views. To save a view, select View > Save View. In the Save View dialog box that opens, enter the View Name, select the view parameters for saving, and then click OK (see Creating Saved Views).
Select Model > Create Animation.
The Create Animation dialog box opens.
Set the Camera to Move Along Path.
Click Animation Options.
The Select Animation dialog box opens.
Click New.
The New Animation Name dialog box opens.
Enter a name for this animation and then click Create to return to the Select Animation dialog box.
The Edit Path Animation dialog box opens.
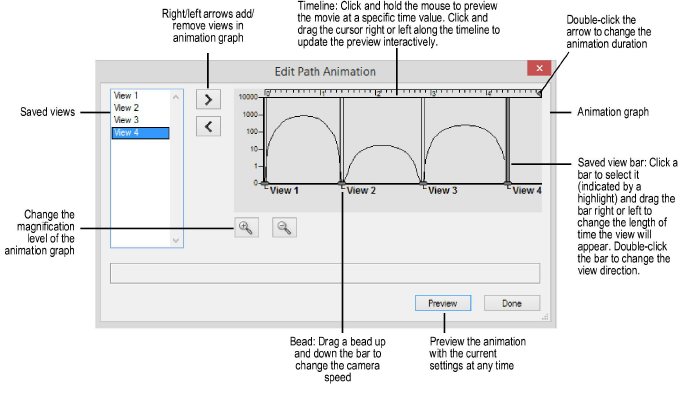
From the list of views on the left, select the starting view name and click the right arrow to add it to the animation graph.
The first view is placed at the graph’s origin: 0 seconds, 0 drawing units/second.
Select the next view to use and click the right arrow to add it to the animation graph. Continue selecting views and adding them to the animation graph until the desired views have been included within the time allotment.
For each added view, a bar with a bead is added to the graph. Drag the bar and bead to change the animation settings (time elapsed between view changes and velocity of camera movement).
The distance between bars is the time in seconds that it takes to move from one view to the next.
Move the bead up and down to determine the slope of the line between bars. This slope indicates the velocity of the movement between views (the number of drawing units/second that the camera moves). In general, the slope should form a steady curve. An uneven curve will cause a choppy camera movement, speeding up and slowing down in a jolting manner. The slope can dip below the X axis; however, this may result in a negative velocity (backward movement).
If a bar is currently selected, the saved view is inserted between that bar and the following bar. If no bars are selected, the saved view is inserted after all the bars that are currently in the animation graph. Bars can be dragged past each other to change the order of the views’ appearance. Each saved view can be added to the graph multiple times.
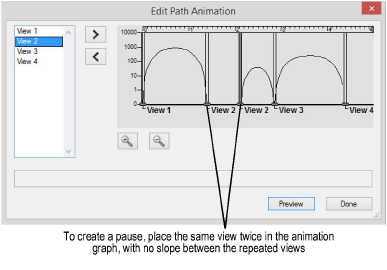
To add a pause to the animation, add the same view twice to the animation graph so that the views are next to each other in sequence. The line between the views should be flat (no upward or downward slope). This creates a velocity of zero and, therefore, a pause in the animation.
To set a specific camera target, double-click a bar.
The Set View Direction dialog box opens.
Setting the view to different specified X, Y, Z coordinates for two consecutive equal views, makes the camera appear to stop its forward motion and pan from one direction to another.
Click to show/hide the parameters.
Click OK to exit the Set View Direction dialog box.
Click Done to return to the Create Animation dialog box.
Specify the remaining parameter settings in the Create Animation dialog box.
Click to show/hide the parameters.
Click Preview to check the animation before saving it. The preview defined by the Time Range settings is shown in the current interactive render mode (OpenGL or Wireframe).
At the end of the preview, the view returns to the view displayed before the preview began.
When satisfied with the preview, click Save Movie to save the animation.
The saved movie observes the current Time Range settings.
The Save As dialog box opens.
Enter the name for the movie file and specify its location. Click Save. The progress of movie creation displays.
Existing move along path animations can be duplicated or deleted from the Select Animation dialog box.
To duplicate an animation:
Select the animation name from the animations list and click Duplicate.
Enter a name for the duplicate animation, and click Create.
The duplicate animation is created.
To delete an animation:
Select the animation name from the animations list and click Delete.
Click OK.
The animation is deleted.
![]()