 Creating Wall
RecessesCreating Wall
Recesses
Creating Wall
RecessesCreating Wall
RecessesTo create a wall recess:
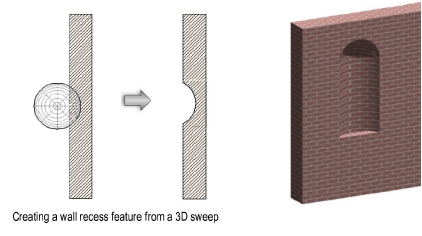
Create the closed 2D or 3D solid object with which to modify the wall. The geometry of the object must define an area or volume that has no self-contacts, no self-intersections, and no edges that fold back on themselves.
For a 2D object, simply make sure that the object overlaps the wall in Top/Plan view. For a 3D object, first create the object at the appropriate height in relation to the bottom of the wall (Z axis); then set the appropriate X and Y axis location so that the object overlaps the wall.
With both the appropriate wall and the modifier object selected, choose the Create Wall Recess command from the appropriate menu:
● Architect workspace: AEC > Create Wall Recess
● Landmark workspace: Landmark > Architectural > Create Wall Recess
● Spotlight workspace: Spotlight > Architectural > Create Wall Recess
Alternatively, for 2D objects only, select Modify > Clip Surface.
The Create Wall Feature Recess dialog box opens; different fields display depending on whether a 2D or 3D modifier object is selected.
Click to show/hide the parameters.
Select the options for the wall feature, and click OK.
~~~~~~~~~~~~~~~~~~~~~~~~~
![]()