Drop Shadow
Attributes
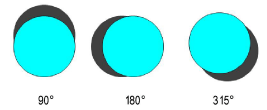
Drop shadows can be applied to any graphical object in Top/Plan
view, including symbols, walls, text, plug-in objects, and sheet layer
viewports. The way shadows are cast varies depending on the type of object.
Object |
Shadow Behavior |
Sheet
layer viewport with no fill |
All
objects floating on the background cast shadows, including viewport
annotations.
If you want drop shadows on annotations,
but you do not want to apply drop shadows to the entire viewport,
edit the viewport and apply drop shadows to annotations directly. |
Sheet
layer viewport with fill |
The
edge of the viewport casts a shadow, as do any annotations that
fall beyond the edge |
Grouped
objects |
Each
object in the group casts a shadow |
Symbol |
2D
objects in the symbol cast a single shadow; to create more shadows,
edit the 2D component of the symbol, and apply drop shadows to
the individual components |
Plants
and massing models |
Plants
and massing models have built-in shadow features; if Display
Shadow in Plan View is enabled in the Object Info
palette for these objects, an applied drop shadow produces two
shadows in plan view |
You can apply drop shadows to most objects from the Attributes
palette. For styled walls, slabs, roofs, and roof faces, enable drop shadows
in the attribute settings for the style that is applied to the object.
To add a drop shadow to an object:
Select
the object and click the Drop Shadow button
on the Attributes palette.
Click
the settings button to the right of the button to open the Drop Shadow
dialog box.
► Click
to show/hide the parameters.
If desired,
click Preview to view the results of
the drop shadow settings.
Click
OK to apply the settings.

► Click
here for a video tip about this topic (internet access required).
~~~~~~~~~~~~~~~~~~~~~~~~~
Setting Class Properties
The Attributes Palette
Drawing Straight Walls
Creating Slab Styles
Creating Roof Styles
Was
this page helpful?

