 Entering
Georeferencing Information for a Design Layer
Entering
Georeferencing Information for a Design Layer
Entering
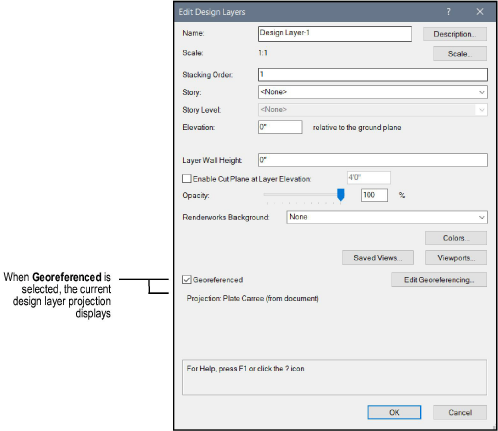
Georeferencing Information for a Design LayerUse the Edit Design Layers dialog box to enable georeferencing for the layers that will use it. Options set here can override the georeferencing options set for the document. Once you have a georeferenced design layer, you can import georeferenced files into it, as well as export images or shapefiles that include georeferencing information.
To accurately measure items on a georeferenced design layer, use the Great Circle tool (from the Site Planning tool set), instead of the dimension tools from the Dims/Notes tool set. See Creating a Great Circle.
To enable georeferencing for a design layer:
Select Tools > Organization to open the Organization dialog box. From the Design Layers tab, select the layer(s) to be changed, and click Edit.
From the Edit Design Layers dialog box, select Georeferenced. The current projection for the layer displays below that field; the default is the current projection setting for the document.
To edit the georeferencing information, click Edit Georeferencing.
The Georeferencing dialog box opens, from which you can choose either to use the same settings used for the document overall, or to enter custom settings. If you choose to use custom settings for this design layer, enter the remaining fields as described for the Document Georeferencing dialog box.
When your entries are complete, click OK to save the settings and return to the Edit Design Layers dialog box.
► Click to show/hide the parameters.
Click OK to enable georeferencing for the design layer. The selected projection displays in the Organization dialog box.
~~~~~~~~~~~~~~~~~~~~~~~~~