The projection commands alter the way the program displays the 3D geometry of the drawing on a 2D screen.
The perspective-related projection commands add distortion to the drawing so that objects that are farther away appear smaller than objects that are closer. These views closely approximate how the 3D model would display in the real world. The perspective view can be uncropped or cropped (see Cropped and Uncropped Perspective Views).
In addition to the standard 2D Plan projection, there are nine 3D projection modes.
To switch projection modes:
Select View > Projection, and then select a projection.
The View bar also provides quick access to the projection commands. Click the Current Projection and select a projection from the list that displays.

Projection Mode |
Description |
|
Matches the projection for a normal 2D drawing; use this view to draw 2D objects |
|
|
Displays an undistorted 3D projection of the drawing—objects display at their exact size regardless of their distance from the active layer plane |
|
|
Displays a projection of the drawing similar to a telephoto lens |
|
|
Displays a projection of the drawing similar to a portrait lens |
|
|
Displays a projection of the drawing similar to a wide angle or fisheye lens |
|
|
Select to set a custom perspective numerically. The Set Perspective Distance dialog box opens. Type the custom perspective value in the Distance field, and then click OK. The lower the value, the wider the angle of perspective. |
|
|
The Cavalier modes show an undistorted front view along with depth (also known as full-depth axonometric projections). The lines along the Z axis (which show the depth of an object) are represented in true length. This distorts the overall image of the object and makes it appear deeper. These modes make precise measurements possible, either from a printout of the drawing or from the screen image. |
|
|
The Oblique Cabinet modes (also known as half-depth axonometric projections) are similar to Oblique Cavalier. However, the depth lines are shortened by 50%. This distorts the actual length of these lines, but represents a more natural view of the object. These modes can still be used to take measurements of vectors perpendicular to the projection plan (along the Z axis) from a printed drawing, but the results must be multiplied by two to obtain the actual dimension. |
OpenGL and Renderworks render modes do not support the Oblique projections; files with an OpenGL or Renderworks render mode are converted from an Oblique projection to Orthogonal projection when saved. To render Oblique projections, use one of the Polygon render modes, or use Hidden Line mode.
A Vectorworks preference sets the preferred projection, applied whenever the drawing is switched from Top/Plan into a 3D view; see Vectorworks Preferences: 3D Tab.
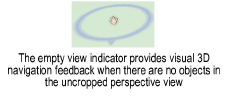
In an uncropped perspective view, scrolling within the drawing, as well as using the Pan and Zoom tools, will result in perspective camera movement while the view remains centered in the window. When there are no objects in the current view to use as a reference during movement, a special indicator displays to help orient the movement.

The Translate View tool can also be used to move through a model and interactively adjust the perspective distortion while in a perspective projection; see Translate View.
~~~~~~~~~~~~~~~~~~~~~~~~~