Mode
Tool
Tool set
Add Edge

Edit Subdivision

3D Modeling
|
Mode |
Tool |
Tool set |
|
Add Edge
|
Edit Subdivision
|
3D Modeling |
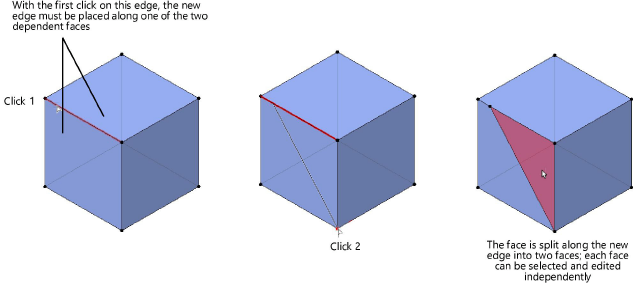
The Add Edge mode adds an edge across a cage mesh face, splitting the existing face into two faces. The new edge is defined by clicking to place each end on an existing cage mesh edge or vertex. The edge must be placed along an existing face; it cannot be added through the center of a subdivision object.
To add an edge to a subdivision model:
1. Select the subdivision object to edit.
2. Click the tool and mode.
Alternatively, double-click the subdivision object with the Selection tool to select the object and automatically activate the Edit Subdivision tool.
As you move the cursor over the cage mesh, its edges and vertices are highlighted to indicate they can be selected.
3. Click on a cage mesh edge or vertex to place the first end of the new edge, and then click on a second edge or vertex to complete the edge. The edge must be placed along a dependent face of the edge or vertex first selected; only available edges and vertices are highlighted for the second selection.
An edge is added, and the existing face becomes two faces that can each be selected for further modification.
~~~~~~~~~~~~~~~~~~~~~~~~~