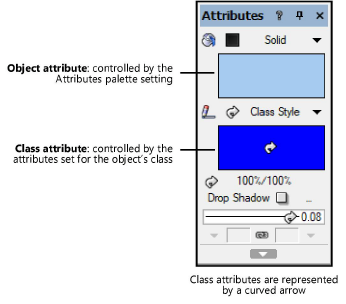
There are two categories of attributes available for each object: object attributes and class attributes. Object attributes are assigned directly to an object from the Attributes palette, Object Info palette, or Resource Manager (depending on the type of attribute). Class attributes are determined by the object’s class settings.
Various attributes that an object uses when it is created are controlled by the Use at Creation options in the Edit Class(es) dialog box (see Setting class properties):
● 2D graphic attributes
● Text in text objects, dimensions, callouts, and other annotation objects
● Textures in walls, roofs, and other 3D shapes
When one of these “use at creation” options is selected for a class, objects created in that class or subsequently assigned to that class use the class attributes. The Attributes palette displays with a curved arrow for attributes that have been set by class. If objects in that class already existed before the “use at creation” option is selected, you are prompted to decide whether to apply the attributes to the existing objects. If you edited attributes for more than one class at the same time, select Yes or No for each class individually, select Yes to All to apply the attributes from all edited classes at once, or No to All to leave the existing objects as they are.
Class attributes can also be assigned after objects are created:
● From the Attributes palette, select Class Style or Class Thickness from the appropriate attribute list.
● In the Shape tab of the Object Info palette, select <Class Text Style> from the Text Style list.
● In the Render tab of the Object Info palette, select Class Texture from the Texture list.
To override class attributes, select the object and apply different attributes directly from the Attributes palette, Object Info palette, or Resource Manager.
Several plug-in objects (such as Vectorworks Design Series doors and windows) offer the option to control the appearance and visibility of the smaller object parts either individually, or by the same class as the overall object. For example, select the <Door Class> option for the door jamb, lintel, and threshold to assign those door parts to the same class as the door object. If you change the door’s class later, the appearance and visibility of the smaller door parts automatically change according to the new class.
For more information, see The Attributes palette.