Image settings are specified through the Attributes palette and applied to a 2D object through the Resource Manager or the Attributes palette. In addition, an image fill can be specified as a default class attribute (see Setting class properties).
To apply an image resource from the Attributes palette:
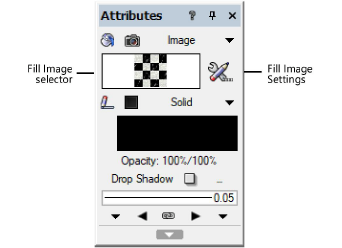
1. Select the object, and then select Image from the Attributes palette fill list.
2.To change to a different image, click the Fill Image selector. From the Resource Selector, double-click a different image to apply it.

3.To customize the image for the selected object, click the Fill Image Settings button.
The Image Settings dialog box opens.
 Click
to show/hide the parameters.
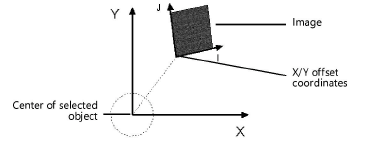
The X and Y axes are file-based, relative to the center of the selected object. The I and J axes are image-based.

To apply an image resource from the Resource Manager:
1. Select the object.
2.From the Resource Manager, right-click on the resource, and select Apply from the context menu. Alternatively, double-click on the resource or drag the resource onto an object to apply it.
The image settings can be edited from the Attributes palette.
~~~~~~~~~~~~~~~~~~~~~~~~~