Command |
Path |
Shortcut |
Section Solids |
● Model ● Context menu |
● Ctrl+Alt+T (Windows) ● Cmd+Option+T (Mac) |
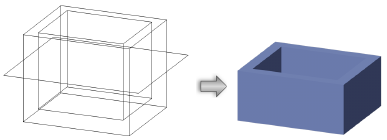
The Section Solids command discards a portion of solids or NURBS surfaces, allowing the creation of planar or stepped sections through a solid object or surface. The sectioned surface can be “marked” by the sectioning surface color.
The sectioning surface must be larger than the base object.
To section a solid:
1. Select both the object to be sectioned (the base object), and the sectioning surface.
The operation will delete the portion of the base object on the same side as the sectioning surface’s normal; select Show Normal from the Object Info palette to display the surface normals. Click Reverse Normal from the Object Info palette if needed to achieve the desired results.
2.Select the command.
The Select Object dialog box opens.
3.Select the sectioning surface. By default, the most recently created object is highlighted, but a different object can be selected by clicking the arrows.
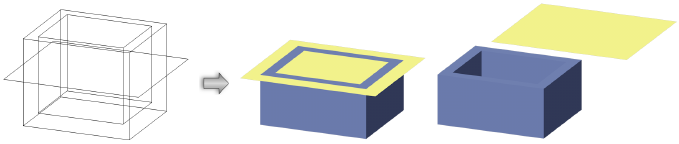
Select Retain Sectioning Object to keep the object in place, or deselect Retain Sectioning Object to automatically delete the sectioning object.
If Retain Sectioning Object is not selected, a solid section is created, with the sectioning surface deleted.
If Retain Sectioning Object is selected, a solid section is created, but the sectioning surface remains in place and can be manipulated independently.
The solid section parameters can be edited in the Object Info palette.
![]() Click
to show/hide the parameters.
Click
to show/hide the parameters.
~~~~~~~~~~~~~~~~~~~~~~~~~