 Creating a surface arrayCreating a surface array
Command |
Path |
Create Surface Array |
Model |
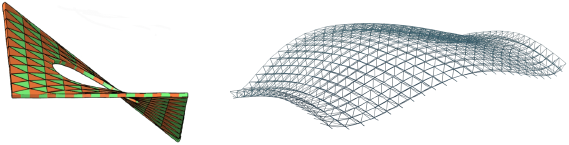
The Create Surface Array command duplicates 2D or 3D geometry onto a planar object or NURBS surface. This allows you to easily create free-form surfaces with geometric patterns, curtain walls, open framework, and more.
NURBS surfaces and certain 2D objects can serve as the base surface.
The following table describes the types of objects that can be used as array items, as well as the method used to project the objects onto the base surface.
Array item |
Projection method |
Solid |
Project by center of bounding cube |
Symbol instance |
Project by symbol origin |
2D/3D
Locus |
Project by object definition points (the result is always a planar object) |
Extrude/multi-extrude |
Project profile object by definition points |
3D
Poly |
Project by each vertex (the result may not be planar) |
Group |
Project member objects as described above; all members of the group must be legal array objects |
|
Click here for a video tip about this topic (internet access required). |
To create a surface array:
1. Select a planar object or NURBS surface to be the base of the array object. Optionally, also select the 2D or 3D geometry that will be duplicated on that surface (alternatively, edit the surface array object after creation to add the array geometry).
2.Select the command.
The Create Surface Array dialog box opens.
![]() Click
to show/hide the parameters.
Click
to show/hide the parameters.
3.Enter the surface array parameters.
Command |
Path |
Edit Surface Array |
Modify |
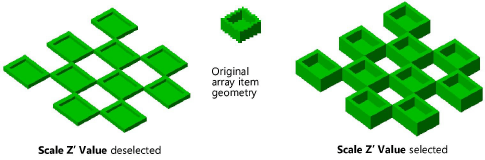
After a surface array has been created, you can edit its properties from the Object Info palette. All of the parameters that are available during the array creation can be changed. You can also change which side of the base surface the array is applied to (Switch Z’ Direction).
You cannot edit the surface array geometry directly; use the Edit Surface Array command to edit the base surface and array components individually.
To edit a base surface or array item:
1. Select the surface array, and then select the command.
2.From the Choose component dialog box, select whether to edit the base surface or the array items.
Alternatively, right-click on the surface array and select Edit Base Surface or Edit Array Items from the context menu.
3.The Edit window displays the item to be edited. A colored border around the drawing window indicates the editing mode is active.
4.Reshape the geometry, change the attributes, and move, add, or remove items as needed. Keep in mind that only one item can serve as the base surface. Also, the base surface and array items must be one of the valid object types described in Creating a surface array.
5.Click the Exit button in the top right corner of the drawing window to return to regular drawing mode and update the surface array.
~~~~~~~~~~~~~~~~~~~~~~~~~
