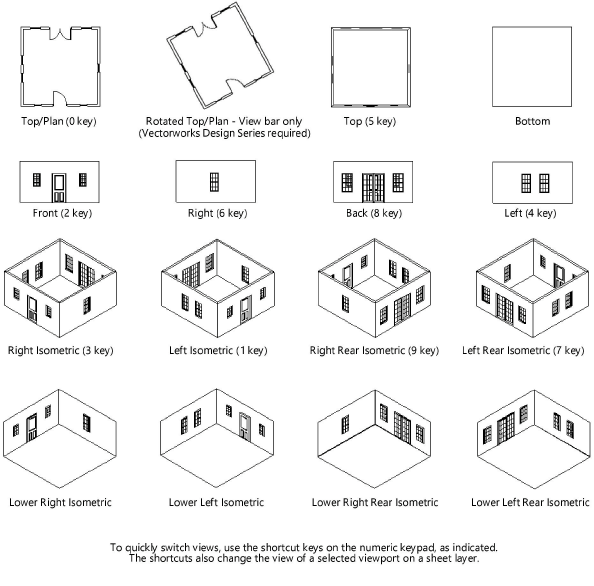
The items under View > Standard Views change the representation and the orientation of the drawing area. The view options can be divided into four basic categories:

To change to a standard view:
Select View > Standard Views, and then select a view.
The view changes and a check mark displays in front of the active view in the Current View/Standard Views list.
The reference for the view, whether working plane or active layer plane, may depend on the selection in the Working Planes palette (see Working plane view and modes).
When a rotated top/plan view exists (Vectorworks Design Series required), the keypad number 0 invokes the Rotated Top/Plan view instead of the standard, unrotated Top/Plan view. Press the 0 key a second time to toggle to the standard unrotated Top/Plan view.
The View bar also provides quick access to the standard view commands. Click the Current View and select a standard view from the list that displays. If the view is something other than a standard view, “Custom View” displays as the current view.
