Rendering modes
|
Command |
Path |
|
Rendering |
View |
Once the drawing is complete or near completion, any textures have been applied, and any desired lighting has been added, select one of the standard views (see Using standard views), and use the Flyover, Walkthrough, Translate View, or Rotate View tools to orient the drawing. For presentation purposes, it is often easier to create sheet layer viewports and render the sheet layers, or render a selected area; both sheet layer viewports and render bitmaps can render in the background while drawing processes can continue.
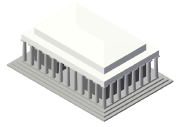
The render modes translate the drawing in various ways to create an image with realistic details and effects. For example, a hidden line rendering is similar to the non-rendered (wireframe) image, but it hides the portion of the objects that would not normally be visible. A Shaded mode rendering also has hidden lines, and colors and shading; it shows how the light sources interact with the object surfaces, and it can show any textures that were applied.
The View bar displays the Render Modes for quick access to the rendering commands. The View bar options display the Render Mode - Short (displaying a shortened version) or the Render Mode - Long (displaying the current render mode options and the current render mode). The Current Render Mode Options button opens the settings dialog box for the current render mode, if applicable.

The Current Render Mode Options button and the Render Modes list on the View bar
The rendering speed depends on the rendering option selected and the number and complexity of objects in the file.
You can continue to work in an active design layer while it renders. Changes to the drawing automatically cancel the rendering in process and begin it again with the changes incorporated. An animated icon and progress bar at the bottom right of the drawing window indicate that rendering is queued or is in progress.
Save files in wireframe mode rather than in a rendered mode, so that files draw more quickly when opened. Rendered viewports are saved in a rendered state when Save viewport cache is selected in the Display tab of document preferences.
For smoother rendering of mesh objects, enable mesh smoothing for the entire file in the document preferences (see Document preferences: Display tab) or for selected meshes on the Render pane of the Object Info palette (see Managing object textures from the Object Info palette).
To select a render mode:
Select the command, and then select the desired render mode.
To cancel a rendering before it is complete, press the Esc key.
|
Rendering command |
Shortcut |
Description |
|
Ctrl+Shift+W (Windows) Cmd+Shift+W (Mac) |
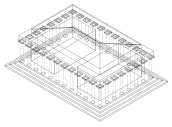
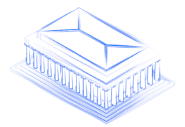
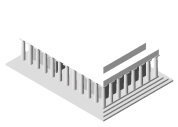
A visual representation of the model is created using lines to represent object edges; see Wireframe options to adjust settings for planar objects
|
|
|
Ctrl+Shift+G (Windows) Cmd+Shift+G (Mac) |
Creates a good-quality, detailed rendering, with colors, shading, and textures; see Shaded options for details
|
|
|
|
Renders without anti-aliasing or ray tracing; low detail level
|
|
|
Ctrl+Shift+F (Windows) Cmd+Shift+F (Mac) |
Renders with reflections, shadows, anti-aliasing, transparency, and a high level of detail
|
|
|
Custom Renderworks |
|
Renders with parameters set by the user
|
|
|
Renders with multiple sketch styles for a hand-drawn look
|
|
|
Ctrl+Shift+E (Windows) Cmd+Shift+E (Mac) |
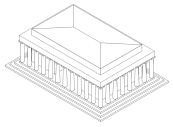
Hides the edge lines of objects that are behind other objects, which gives a solid appearance; optionally displays surface hatches that give the appearance of textures (see Hidden line rendering with surface hatches)
|
|
|
Ctrl+Shift+D (Windows) Cmd+Shift+D (Mac) |
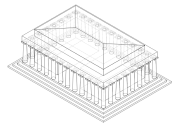
Edge lines of objects that are behind other objects display as dashed lines
|
|
|
Sketch (Design Suite required) |
Ctrl+Shift+S (Windows) Cmd+Shift+S (Mac) |
See Sketch rendering. |
|
|
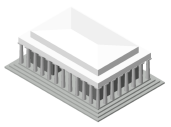
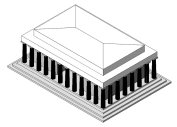
Displays objects as solids, and displays attributes such as colors
|
|
|
|
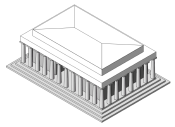
An Unshaded Polygon rendering with shading added
|
|
|
|
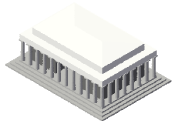
A Shaded Polygon rendering with no edge lines
|
|
|
Ctrl+Shift+P (Windows) Cmd+Shift+P (Mac) |
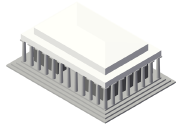
A Hidden Line rendering on top of a Shaded Polygon - No Lines rendering; edges and curved surfaces are cleaner than those in a Shaded Polygon rendering
|
To get the best performance from rendering, use a video card that supports hardware-accelerated render modes. There are significant compatibility issues with some cards; see vectorworks.net/sysreq for a list of video cards that are compatible with the Vectorworks program. If a model is too complex to render the design layer successfully, an alert message displays, informing you that the render mode has been switched to wireframe.
The power-saving video settings of some laptops may cause out-of-memory issues or other display issues that can easily be solved by turning off the power-saving video features.
A Vectorworks preference sets the preferred 3D render mode, applied whenever the drawing is switched from Top/Plan into a 3D view; see Vectorworks preferences: 3D pane.
