Changing the design layer stacking order
Design layers are viewed and printed in stacking order, the top-to-bottom order in the Layers Setup dialog box. Initially, layers are stacked in the order in which they are created, but their order can be changed at any time.
To change the stacking order of design layers:
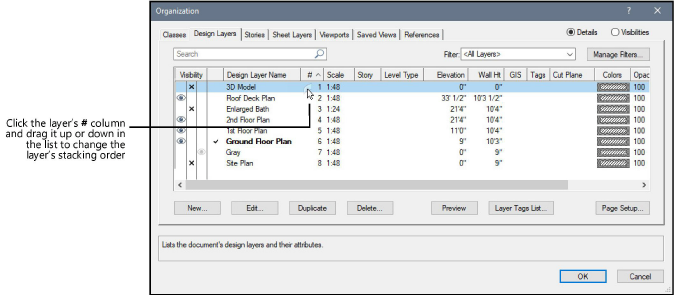
From the Organization dialog box, select the Design Layers tab in Details view to see the current stacking order. The # column to the right of the layer name indicates the layer’s current position in the stack, with 1 being the top layer.
Use one of the following methods to change the layer stacking order:
The # column must be the current sorting column to change the stacking order; if the list is not currently sorted by stacking order, click the # column heading to change it. Then click the # column of the layer to be moved, and drag it up or down the list. A horizontal line indicates where the layer will be inserted in the current order.
Select the layer to move, and then click Edit (or double-click a layer row) to open the Edit Design Layers dialog box. In the Stacking Order field, enter the number for the new stacking order position of the layer.
The Design Layers tab displays the new stacking order.