Creating panoramic image backgrounds
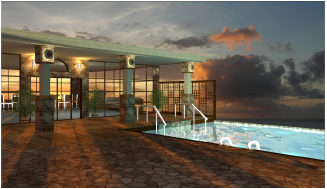
When a panoramic background is applied, it behaves as if an infinitely large, textured, sphere or cube were centered on the model. The virtual sphere or cube is so large that view position changes do not affect its display. However, view orientation changes do affect which part of the image is shown in the background; this provides a true 3D sense to the model.

By default, a panoramic image background renders as both a background and a light source. However, it is possible to use one background resource as an environment background, another for environment lighting (see Setting lighting options), and another for reflections (see Creating Renderworks styles). Several Renderworks styles incorporate the use of a panoramic image background.
|
Purpose of panoramic background resource |
Creation method |
|
Use a panoramic background resource as both environment background and environment lighting |
Create a panoramic background resource and apply it to the layer. By default, the Lighting Options dialog box (accessed with the Set Lighting Options command) is set to use the lighting from the current background. |
|
Use a panoramic background as environment background only |
Create a panoramic background resource and apply it to the layer. In the Lighting Options dialog box, specify None for Environment Lighting. |
|
Use a panoramic background resource as environment lighting only |
Create a panoramic background resource, but do not apply it to the layer. In the Lighting Options dialog box, select From Selected Background and specify the resource. |
|
Use one panoramic background resource as an environment background and a different background resource for environment lighting |
Create the first panoramic background resource and apply it to the layer (environment background). Create the second background resource but do not apply it to the layer. Instead, in the Lighting Options dialog box, select From Selected Background and specify the second resource (environment lighting). |
Panoramic backgrounds render best in Perspective projection. In Orthogonal projection, panoramic backgrounds are suitable for lighting and reflections, but appear as a single background color because of the narrow field of view.
If the panoramic background includes a sun in its image, and the drawing also contains directional lights, the light directions may not match, creating multiple shadows.
To create a panoramic background:
Create the background resource as described in Creating Renderworks backgrounds.
Select Panoramic Image from the Background list.
Select the image file to use; .hdr, .jpg, and .png files can be used. The image is automatically converted to Lat/Long format. An OpenEXR (.exr) file can also be used; it must be in Lat/Long format.
The Edit Panoramic Image Background dialog box opens.
Click to show/hide the parameters.Click to show/hide the parameters.
|
Parameter |
Description |
|
Preview |
Displays a preview of the selected image |
|
Rotation |
Rotates the image clockwise about the Z axis, changing the light orientation and visible portion of the image (range: -180–180 degrees; positive angles are rotated clockwise) |
|
Change Image |
Imports a different image to use as the background |
|
Brightness (%) |
Specifies the brightness for environment lighting; enter a percentage or drag the slider to change the brightness. A value over 100% can be entered. |
|
Saturation (%) |
Specifies the color saturation for environment lighting; enter a percentage or drag the slider to change the saturation. A value over 100% can be entered. |
|
Quality |
Specifies the sampling value of the rendered image; higher-quality sampling results in better image resolution, but longer rendering times. Select From Render Mode to use the Soft Shadows quality specified in the render options (see Custom Renderworks options). |
