Marionette tutorial: Creating a simple extrude
This simple tutorial explains how to get started with placing Marionette nodes, entering input values, and connecting nodes. The Marionette script is executed to create an extruded column.
Step 1: Place Marionette nodes
To decide which nodes need to be placed to create an extruded column, think about how you would create a column in a Vectorworks drawing. You might draw a circle with a certain radius, and then extrude it. Therefore, at a minimum, you need a node to create a circle, a node to set the radius of the circle, and a node to perform an extrude operation.
![]() To place the required Marionette nodes:
To place the required Marionette nodes:
In Top/Plan view, click the Marionette tool from the Basic palette, and click Insert mode.
Click Current Node on the Tool bar. From the Resource Selector, locate the Objects category of node objects, and double-click on the Create Circle node resource to select that node.
Click in the drawing to place the node.
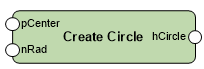
Looking at the placed node, you can see that it has two possible inputs: a radius value and a center point. We will add a radius value. With the Marionette tool still selected, locate the Input category from the Current Node Resource Selector and double-click to select the Integer node resource.
Click in the drawing to place the Integer node.
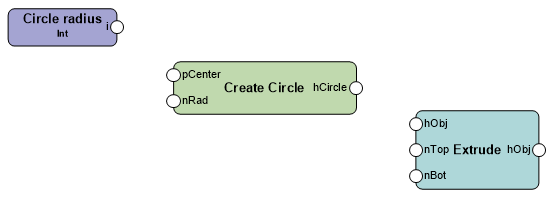
We will create a circle with a radius of 4. With the node selected, enter a value of 4 for Integer in the Object Info palette. For Name, type Circle radius. This helps you identify the purpose of this integer node. It is a good idea to name such nodes for easy identification, especially later on with complex scripts.
With the Marionette tool still selected, locate the Objects category from the Resource Selector and double-click to select the Extrude node resource.
Click in the drawing to place the Extrude node.
Step 2: Connect the nodes and run the script
To connect the nodes and create the extrude with the script:
With the Selection tool, connect the output from the Integer node to the radius (Rad) input of the Create Circle node, and then connect the output from the Create Circle node to the profile (Obj) input of the Extrude node.

To run the Marionette script, right-click on any node in the network and select Run Marionette Script from the context menu. Alternatively, select Run from the Object Info palette.
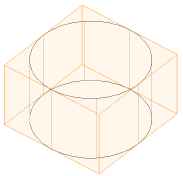
The extruded object is created. It is selected and saved as a group, but it can be ungrouped to access the extrude.
You have created your first Marionette script!