 Step 3: Add a top
The location and size of the cabinet’s top surface will be calculated based on the body’s rectangular prism.
To add the cabinet top:
Select one of the Rectangular Prism Body wrapper node copies, and enter the Name Rectangular Prism Top in the Object Info palette.
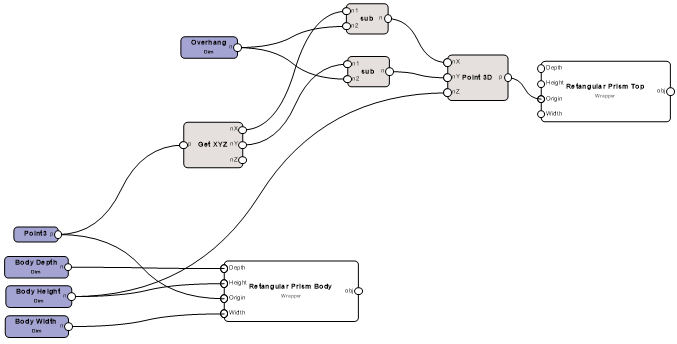
Insert the following nodes to create a network as illustrated.
Get XYZ node: The X and Y locations of the top of the cabinet are based on those of the body, and are altered by the two Subtract nodes to provide a defined overhang offset. The bottom surface of the cabinet top is located at the same Z value as the top of the body, so the Body Height node can bypass the Get XYZ node and be wired directly into the Z port of the new Point 3D node.
Dimension node: This will specify an overhang offset. Name this node Overhang. Because the offset will be the same on all sides, the same overhang node connects to both Sub nodes; the value of this node is defined later.
Two Subtract nodes: These nodes subtract the dimension provided by the Overhang node from the X and Y locations to help define the top’s offset.
Point 3D node: The X, Y, and Z locations for the top are calculated based on those of the cabinet body; if the dimensions of the body change, the top automatically updates as well.
Connect the wires to the Rectangular Prism Top wrapper as illustrated.
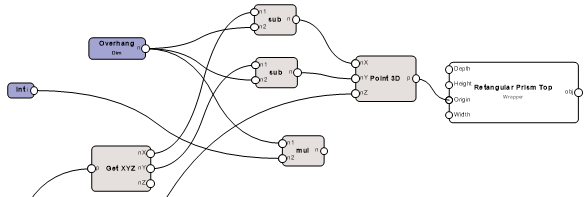
To make the top of the cabinet wider and deeper than the body, multiply the overhang dimension by two.
Add an Integer node and assign it a value of 2.
Add a Multiply node to serve as the multiplier.
Connect the wires.
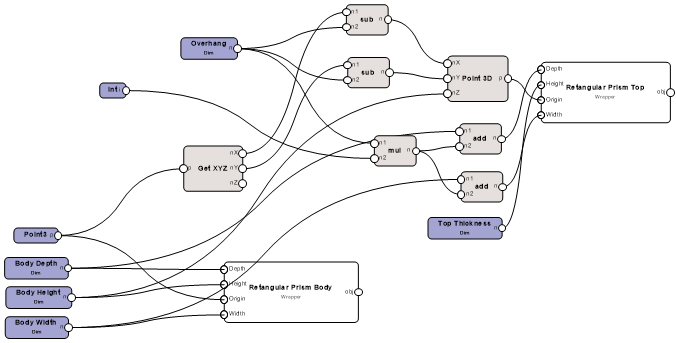
Add the multiplier to the Width and Depth of the top of the cabinet by inserting two Add nodes. To control the height of the top, add a Dimension node named Top Thickness to the top Height. Connect the wires.
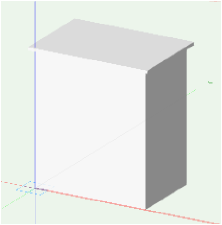
Enter a value of 1.5” for the Overhang and 1” for the Top Thickness.
Select a node and click Run from the Object Info palette.
A rectangular prism displays at the assigned origin with the prescribed dimensions to add a top to the cabinet body.
You can download the tutorial at this stage here (internet access required).
