 Connecting roof faces
|
Mode |
Tool |
Tool set |
Shortcut |
|
Single Object Connect
Dual Object Connect
|
Connect/Combine
|
Basic |
; (Windows) Option+L (Mac) |
Use either the Single Object Connect or the Dual Object Connect mode of the Connect/Combine tool to trim roof faces that intersect or to extend one roof face to another. Also specify whether to use a miter or vertical edge for the roof face joins.
![]()
To connect two roof faces:
Click the tool and mode.
If the roof faces have different pitches, select the mode to join the faces.
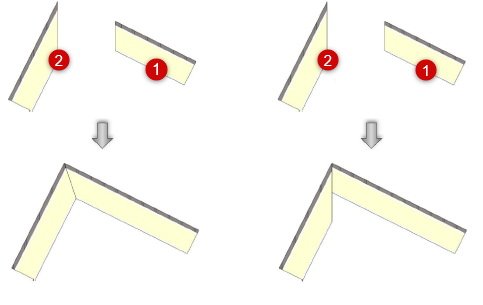
To miter the roof face edges at the join, select Miter Roof Face Joins.
To cut the roof face edges vertically at the join, select Vertically Cut Roof Face Joins.
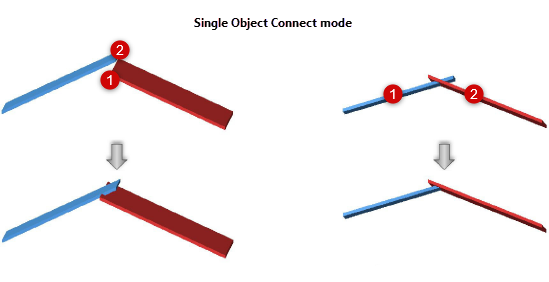
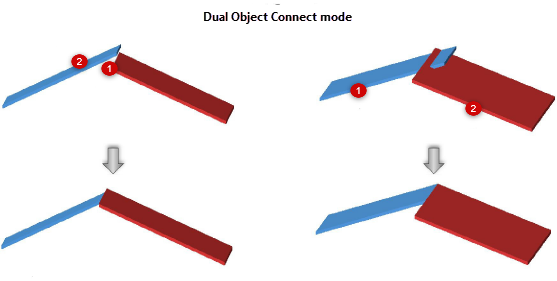
Click the first, and then the second, roof face to connect.
The result of the operation depends on the mode selected, the positions of the roof faces, and the portion of the roof faces clicked upon.

For non-intersecting faces, the first clicked face is extended to meet the second clicked face. The first clicked face is trimmed to keep the clicked portion for intersecting faces.

For non-intersecting faces, both faces are extended or trimmed to join. Both faces are trimmed and the clicked parts of the faces are kept for intersecting faces.

With Miter Roof Face Joins enabled, the roof has a constant thickness, and no vertical offsets between the top and bottom surfaces. With Vertically Cut Roof Face Joins enabled, the joins between faces are cut vertically with vertical offsets between bottom surfaces.
Roof face edges only miter along the edges where they meet. If multiple faces join to a common edge, the common edge will have multiple segments of different miters.
To remove the mitered edge, select the roof face, and click Remove Mitered Edges from the Object Info palette. This resets the eave to the original Eave Cut (if needed), and resets all other edges to vertical cut geometry.

