Loft surface using two rails
|
Mode |
Tool |
Tool set |
Shortcut |
|
Birail Sweep
|
Loft Surface
|
3D Modeling |
Shift+K |


To create a loft surface using two NURBS curve rails:
Click the tool and mode.
Click on each rail, and then click on the cross section. The cross-section profile curve does not need to intersect the rail curves.
In this mode, only one cross section can be selected.
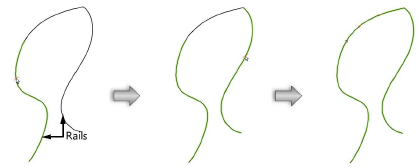
Once the profile curve is selected, press Enter or click the check mark button on the Tool bar.
The Loft Creation dialog box opens.
Specify the desired loft creation settings (see Loft surface using no rails).
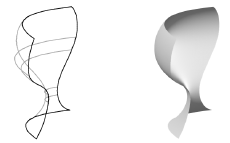
The loft surface is created differently depending on whether the profile curve is open or closed, and how the start/end of the rails touch the profile curve. In certain instances, the click order (which rail is clicked first) and location (part of the profile curve that is clicked) will produce a different loft surface.
|
Status of profile curve and rails |
Effect of rail click order/profile click location |
|
Open profile curve |
|
|
Start/end of one of the rails touches the start/end of the open profile |
The rail click order and profile click location do not affect the loft surface creation |
|
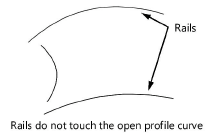
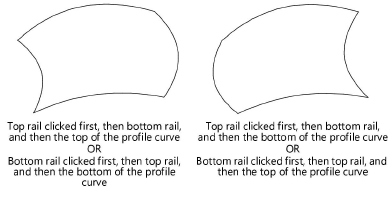
Start/end of the rails do not touch the start/end of the open profile, or do not touch the open profile at all
|
Both the rail click order and the location where the profile is clicked affect how the loft surface is created
|
|
Closed profile curve |
|
|
Start/end of one of the rails touches the closed profile curve |
The click order and location do not affect the loft surface creation |
|
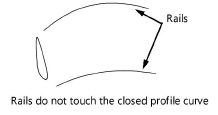
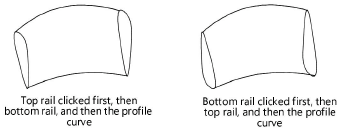
Start/end of the rails do not touch the closed profile at all
|
The click order affects how the loft surface is created
|