Mapping image fills
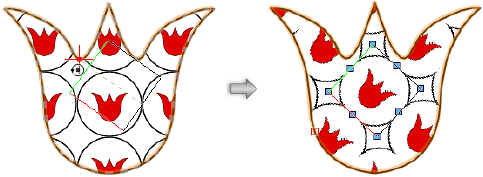
Once an image fill is applied to an object, the fill can be customized to display as desired for that object without affecting the underlying resource. This customization can be done using either the Fill Settings popover on the Attributes palette or the Attribute Mapping tool. If an object's fill is edited with the Attribute Mapping tool, the changes are reflected on the settings popover on the Attributes palette. Conversely, edits made on the Attributes palette are reflected in the mapping tool’s editing object.
Mapping image fills with the Attributes palette
To customize the image resource's display for a selected object:
Select one or more objects containing the same image fill.
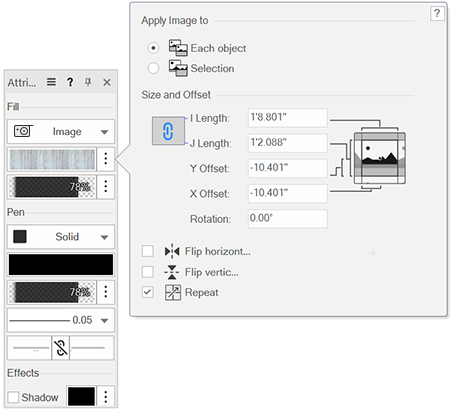
Click Fill Image Settings on the Attributes palette.
The popover opens.
Click to show/hide the parameters.Click to show/hide the parameters.
|
Parameter |
Description |
|
Apply Image To |
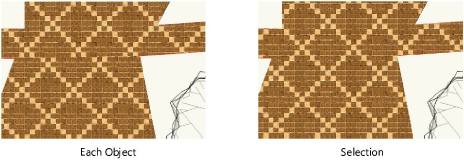
Select Each object to apply the image to each selected object individually; choose Selection to apply the image across the selected objects, spanning the objects.
|
|
Size and Offset |
|
|
I/J Length |
Specifies the distance in the I/J direction for a single instance of the image fill (in the file’s current units). To maintain the aspect ratio of the image when one length is changed, click the link button; the other length value changes automatically. |
|
X/Y Offset |
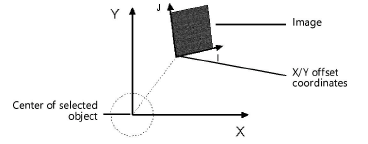
Indicates the image starting point coordinates relative to the center of the selection bounding box (in the file’s current units) |
|
Rotation |
Specifies the angle of the image fill |
|
Flip horizontally/Flip vertically |
Flips the image orientation horizontally, vertically, or both |
|
Repeat |
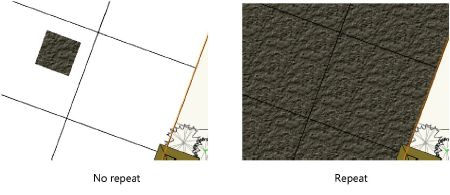
Repeats the image over the object; deselect to apply a single instance of the image to the object
|
The X and Y axes are file-based, relative to the center of the selected object. The I and J axes are image-based.
Changes to the image mapping display in the selected object as you adjust the parameters.
After setting the parameters, click anywhere outside the popover to accept the settings.
Mapping image fills with the Attribute Mapping tool
|
Tool |
Tool set |
Shortcut |
|
Attribute Mapping
|
Basic Visualization |
Shift+A (Windows) Option+A (Mac) |
To modify an object’s image fill:
Click the tool.
Click an object containing an image fill. Only one object at a time can be edited. An editing object with eight handles is placed over the image.
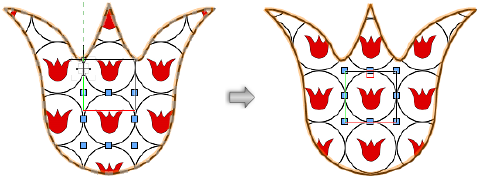
Use the editing object to set the image origin location, i-axis and j-axis lengths, and rotation angle. The fill can also be nudged.
|
Action |
Description |
|
Edit the location of the fill (image origin) |
Click and drag the editing object to the desired location.
|
|
Edit the image i-axis and j-axis location |
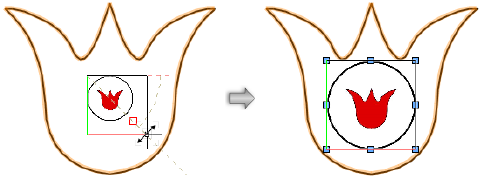
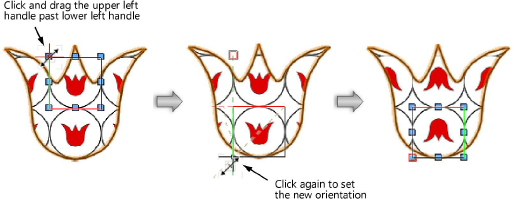
Click a corner handle (the resize cursor displays) and drag the handle to the new size. Press the Shift key while dragging to constrain the image aspect ratio. Click to set.
|
|
Edit the image rotation |
Click a side handle (the rotate cursor displays) and drag the handle to the new rotation angle (or press the Tab key and enter a Rotation value in the Data bar). Click to set. Press the Ctrl key (Windows) or Cmd key (Mac) while rotating to rotate about the image center.
|
|
Flip the image horizontally or vertically |
Click and drag a corner of the editing object past another corner of the editing object. Click to set. Drag horizontally or vertically to flip the image in that direction; drag diagonally to flip the image both horizontally and vertically.
|
Options in the Image Settings popover (accessed from the Attributes palette) also affect image attribute mapping. When the link button between the I Length and J Length fields is selected, the image cannot be flipped or mirrored by dragging the editing object’s handles vertically or horizontally; only diagonal dragging is allowed. Use the Flip horizontally or Flip vertically options in this popover to change the fill orientation without moving or resizing the image.

