Interactive appearance settings
|
Command |
Path |
|
Vectorworks Preferences |
Tools > Options Quick Preferences |
You may find it helpful to customize the appearance of interactive elements in the program, including general elements, object highlighting, SmartCursor elements, and snap points.
To configure the appearance of interactive elements:
Select the command. On the Interactive pane of the Vectorworks Preferences dialog box, click Interactive Appearance Settings.
Alternatively, click Snapping Settings on the Snapping set to open the General Snapping Settings popover, and click Interactive Appearance Settings.
The Interactive Appearance Settings dialog box opens.
Select either the Light Background or Dark Background tab, depending on whether the dark background display preference is enabled (see Vectorworks preferences: Display pane). The same elements can be customized for both background types.
Click to show/hide the parameters.Click to show/hide the parameters.
|
Element |
Description |
Example |
|
Clip Cube |
|
|
|
Edges |
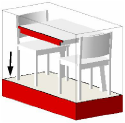
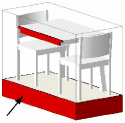
Sets the color for edges where surfaces intersect a face of a clip cube |
|
|
Solid Fill |
Sets the color for the area where solid objects intersect a face of a clip cube |
|
|
Floating Data Bar |
|
|
|
Background |
Sets the background color and opacity of the Floating Data bar |
|
|
Outline and Text |
Sets the outline and text color of the Floating Data bar |
|
|
General |
|
|
|
Active Layer Plane |
Sets the color and opacity of the active layer plane grid |
|
|
Background - 3D Views |
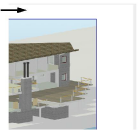
Sets the background color of the drawing area for design layers in 3D views |
|
|
Background - Perspective Horizon Ground |
Sets the ground color and ground horizon color when in non-cropped perspective view; the foreground color gradually transitions to the background color as a gradient in the direction of the horizon |
|
|
Background - Perspective Horizon Sky |
Sets the sky color and sky horizon color when in non-cropped perspective view; the foreground color gradually transitions to the background color as a gradient in the direction of the horizon |
|
|
Background - Sheet Layers |
Sets the background color of sheet layers |
|
|
Background - Top/Plan |
Sets the background color of the drawing area for design layers in Top/Plan view |
|
|
Editing Modes Border |
Sets the color, opacity, and size of the colored border when in object editing mode (see Object editing mode) |
|
|
Grid |
Sets the color and opacity of the reference grid |
|
|
Object Previews |
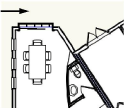
Sets the color of the preview image displayed when using various tools (the Mirror tool in this example) |
|
|
Page Boundary |
Sets the color and opacity of the page boundary border |
|
|
Repetition Opacity |
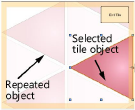
Sets the opacity for the repetitions of the selected line type or tile object, which are displayed when a line type or tile resource is being edited |
|
|
Reshape Handles - Active Layer |
Sets the color of the square handles that can be dragged to reshape a selected object on the active layer |
|
|
Reshape Handles - Inactive Layer |
Sets the color of the square handles that can be dragged to reshape a selected object on an inactive layer |
|
|
Working Plane |
Sets the color of the working plane and opacity of its fill and frame, as well as the opacity and size of the working plane axes |
|
|
X-ray Select Mode |
Sets the opacity of the objects in X-ray Select mode |
|
|
Object Highlighting |
|
|
|
Action |
Sets the color, opacity, and size of the highlighting for objects being modified |
|
|
Active Layer |
Sets the pattern, forecolor, backcolor, opacity, and size of the highlighting for an object that is selected on the active layer |
|
|
Automatic Plane Source |
Sets the color and opacity of the automatic working plane |
|
|
Checked Out Objects |
Sets the opacity and size of the highlighting for an object that is checked out from a shared project |
|
|
Inactive Layer |
Sets the pattern, forecolor, backcolor, opacity, and size of the highlighting for an object that is selected on an inactive layer |
|
|
Locked |
Sets the pattern, forecolor, backcolor, opacity, and size of the highlighting for an object that is locked |
|
|
Pre-Selection - Active Layer |
Sets the color, opacity, and size of the highlighting for an object that is pre-selected on the active layer; an object can be pre-selected by being either under the cursor’s selection box, or inside a selection marquee |
|
|
Pre-Selection - Inactive Layer |
Sets the color, opacity, and size of the highlighting for an object that is pre-selected on the inactive layer |
|
|
Pre-Selection - Locked |
Sets the color, opacity, and size of the highlighting for an object that is locked |
|
|
Snap Object |
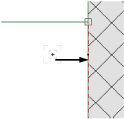
Sets the color, opacity, and size of the highlighting for an object that is being snapped to; the highlighting is always a dashed line |
|
|
Tool Highlighting |
Sets the color, opacity, and size of the highlighting for an object that can be edited by the active tool |
|
|
Occluded 3D Graphics |
Sets the opacity of feedback graphics, such as highlighting, snapping, selection indication, and some preview graphics, when occluded by a rendered 3D solid |
|
|
Rulers |
|
|
|
Background |
Sets the background color and opacity of the rulers |
|
|
Cursor Position Indicators |
Sets the color, opacity, and size of the cursor position indicators on the rulers |
|
|
Marks and Text |
Sets the color of the tick marks and text on the rulers. The tick marks and text become blue in a Rotated Top/Plan view and light gray in a 3D view. |
|
|
SmartCursor |
|
|
|
Acquisition Hints |
Sets the color, opacity, and size of the graphical hints which display near the cursor to show when a smart point, smart edge, or vector lock can be acquired or released |
|
|
Cue Background |
Specifies the background color and opacity of SmartCursor cues |
|
|
Cue Text |
Sets the color and size of SmartCursor text |
|
|
Datum Indicator |
Sets the color, opacity and size of the datum indicator |
|
|
Extension Lines - Angle |
Sets the color, opacity and size of angle extension lines |
|
|
Extension Lines - Smart Point |
Sets the color, opacity and size of smart point alignment lines (the selected color may be overridden by the default X, Y, and Z axis colors) |
|
|
Planes |
Sets the color and opacity of angle and alignment planes (the selected color may be overridden by the default X, Y, and Z axis colors) |
|
|
Selection Box |
Sets the color, opacity, and size of the selection box around the SmartCursor |
|
|
Smart Edges |
Sets the color, opacity and size of smart edge lines |
|
|
Smart Points |
Sets the color, opacity, and size of smart points |
|
|
Snap Box |
Sets the color, opacity, and size of the snap box around the SmartCursor |
|
|
Vector Locks |
Sets the color, opacity, and size of vector locks |
|
|
Snap Points |
|
|
|
Available |
Sets the color, opacity, and size of snap points available near the cursor and within the snap box |
|
|
Congestion Indicator |
Sets the color, opacity, and size of the snap box when there are too many available snap points around the SmartCursor (using the snap loupe is recommended in this situation; see Using the snap loupe) |
|
|
Current |
Sets the color, opacity, and size of the current snap indicator |
|
|
Master Snap |
Sets the color, opacity, and size of the master snap point for priority snapping within the snap box |
|
|
Obtained |
Sets the color, opacity, and size of the acquired snap point |
|
|
Special |
Sets the color, opacity, and size of snap point hints such as midpoint, center, along line, and tangent snaps |
|
|
Subdivision - Crease and Hole Highlight |
Sets the color of the highlighting for a subdivision object’s creased cage mesh entities when in Crease mode and holed faces when in Face Hole mode |
|
|
Reset |
Restores the default settings for all interface elements |
|
Click the column heading to sort by interface element, if desired. Select the element to change, and then set the parameters that display to the right of the element list as needed. Different parameters display, depending on the element selected.
Click to show/hide the parameters.Click to show/hide the parameters.
|
Parameter |
Description |
|
Pattern/ForeColor/BackColor |
To use a solid color, select the color from the ForeColor menu; then from the Pattern menu, select the solid pattern for that color. To use a pattern, select the ForeColor and BackColor colors from the menus (see Applying colors); then select a Pattern. |
|
Color |
Select the color (see Applying colors) |
|
Opacity |
Drag the slider right to increase or left to decrease the opacity of the interactive element |
|
Size |
Drag the slider right to increase or left to decrease the width of the interactive element |

