 Inserting a television object
|
Mode |
Tool |
Tool set |
|
Modes for The Symbol Insertion tool |
Television
|
Audio/Video |
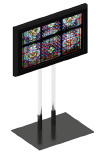
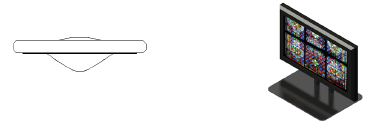
The television object simulates CRT and flat screen televisions.

To insert a television:
Click the tool and the insertion modes.
Click to place the object in the drawing, and click again to set the rotation. The first time you use the tool in a file, a properties dialog box opens. Set the default parameters. The parameters can be edited later from the Object Info palette. Some information from parameters can also be placed on the drawing using the Text Options.

Click to show/hide the parameters.Click to show/hide the parameters.
|
Parameter |
Description |
|
TV Type |
Select the type of TV: flat panel, CRT, or CRT curved |
|
Screen Aspect |
Select the aspect ratio of the screen: 4:3 (Standard) or 16:9 (Wide screen); curved CRT screens cannot have a 16:9 aspect ratio |
|
Casing |
Displays the television casing |
|
Select Casing |
Select the television casing from the Resource Selector; available models depend on the selected TV Type and Screen Aspect |
|
Brand |
Specifies the television brand |
|
Model |
Specifies the television model |
|
Size |
Displays the television size |
|
Width (image) |
Displays the width of the screen image area |
|
Height (image) |
Displays the height of the screen image area |
|
Tilt |
Sets the tilt of the television in degrees; positive values tilt the television screen facing up, while negative values tilt the television screen facing down |
|
Weight |
Displays the weight of the television |
|
Hanging Point |
Select whether to use a top, middle, or bottom hanging point |
|
Wattage |
Enter the required wattage, for power consumption calculations and reporting |
|
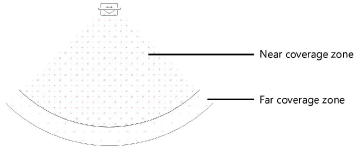
Show coverage zone (2D only) |
Indicates the viewing area based on the screen size; observers within the area should be able to see the screen
|
|
Settings |
|
|
Zone Reference |
Calculates the coverage zone based on screen width, height, or diagonal measurement |
|
Max Horiz. Angle/Max. Vert. Angle |
Indicates the maximum viewing angle of the screen horizontally and vertically, relative to dead-on |
|
Viewing Height |
Enter the height of the average viewer when watching (likely, a seated height) |
|
Near Multiplier |
Specifies the multiplier of the reference dimension to determine the extent of the near coverage zone |
|
Far Multiplier |
Specifies the multiplier of the reference dimension to determine the extent of the far coverage zone |
|
Screen Image |
Displays the name of the current screen image |
|
Edit Screen Image |
Opens the Edit Screen Image dialog box to select the image for screen display; see Assigning an image, video, or input |
|
Adjustable Stand |
For flat panel televisions, select a stand to add to the screen casing |
|
Pole Height |
Select a height measurement from the base of the stand to the bottom of the screen casing, or select Custom to enter a Custom Height |
|
Casing Height |
Specifies the height of the casing on the stand |
|
Power and Signal Details |
|
|
Circuit Number |
Indicates the circuit number where the television is plugged in
|
|
Circuit Name |
Specifies the name of the bundled circuit group |
|
Source |
Specifies the source information |
|
Drive Line |
Indicates information about the drive line feeding the signal to the television |
|
Input |
Specifies the input information |
|
Frame Rate |
Specifies the frame rate information |
|
Resolution |
Specifies the resolution |
|
Location, Position, Unit, Purpose, Vendor, Cost, Note |
Adds information which can be placed on the drawing or used for reporting |
|
Text Options |
Opens the Text Options dialog box, to enable the display and format the text of labels |
|
Default Text Positions |
Restores text labels to their default positions |
|
Opens the Classes dialog box, to specify class naming for the various portions of the television. This allows portions of the television to be set to visible, grayed, or invisible. Use the standard class, select a class from the list of classes present in the drawing, or create a new class. Select <Television Class> to place the television element in the same class as the television. Class Prefix: Specifies an optional default root class naming standard for all television parts; click Assign Default Classes With Prefix to begin all television class names with the prefix, so that they are sorted together. Assign Default Classes With Prefix: Sets the class names for all television elements to the standard, using the Class Prefix if there is one. Television elements: For each portion of the television, specifies the class name standard; the class names shown here are applied to the elements. |
|
|
Update |
Updates the object when changes have been made to the Object Info palette parameters |
|
Load Information |
A television is considered a point load in Braceworks calculations; if the insertion point is on a rigging object, it is considered to be a load on that structure. Load information is used for Braceworks calculations and reports (Braceworks required). |
|
Include in calculations (Braceworks required) |
Includes the television in Braceworks calculations; deselect to exclude the television from participating in structural calculations |
|
Load Group Name |
The load category is always Video for video screen objects |
|
Load ID |
Enter a unique ID for the load for informational use in reports |
|
Load Name |
Identifies the object in load calculations |
|
Total Weight |
Enter the total weight of the object |
|
Position |
Displays the name of an associated rigging object, if the object is attached. For methods to attach loads, see Making the attachment. |
|
Equipment Subparts |
Lists the subparts that make up the object. These subparts are counted and reported separately in equipment and inventory lists. The parameters must be selected for display for this type of object in Spotlight preferences: Inventory pane. |
|
Equipment Virtual Parts |
Virtual parts are associated with an object and are reported in equipment and inventory lists, but do not display in the drawing. After adding virtual parts, they are listed in the Object Info palette. |
|
Edit Virtual Parts |
Opens the Virtual Parts dialog box to add virtual parts to the object; see Managing virtual parts and independent virtual parts |
|
Assign Sources |
Opens the Assign Sources dialog box to assign the object and its subparts and virtual parts to an inventory source; see Assigning equipment to an inventory |


