Subdivision modeling
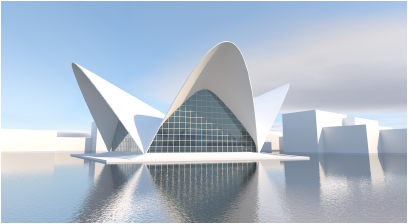
Subdivision modeling allows for the easy, intuitive creation of free-form shapes, whether designing an object or exploring a concept. After creating a subdivision object or converting an existing object to a subdivision object, sculpt the model using the Edit Subdivision tool.
Click here for a series of video tips about this topic (internet access required).


Creating subdivision objects
|
Command |
Path |
|
Create Subdivision Primitive |
Model |
To create a subdivision object:
Select the command.
The Create Subdivision Primitive dialog box opens.
Alternatively, double-click the Edit Subdivision tool to open the Create Subdivision Primitive dialog box.
Click to show/hide the parameters.Click to show/hide the parameters.
|
Parameter |
Description |
|
Subdivision Primitives |
Select the object's shape; the object preview adjusts to show the shape selected |
|
Size |
For all shapes except torus and ring, enter the size of the mesh cage |
|
Major Radius |
For the torus and ring shapes, enter the major radius |
|
Minor Radius |
For the torus and ring shapes, enter the minor radius |
|
Segments on Major Axis |
For the torus and ring shapes, enter the number of segments on the major axis; the number must be greater than 2 |
|
Segments on Minor Axis |
For the torus shape, enter the number of segments on the minor axis; the number must be greater than 2 |
|
Subdivision Iteration |
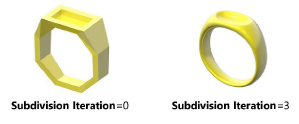
Select the density of subdivision mesh faces per cage face; this affects modeling speed and also final export quality. It can be edited later from the Object Info palette. An iteration setting of 0 creates one subdivision mesh face per cage face; this is equivalent to polygon modeling. An iteration setting of 1 creates 4 subdivision mesh faces per cage face; 2 creates 16; 3 creates 64; 4 creates 256; and 5 creates 1024.
|
|
Center Location |
If Center at Next Click is not selected, enter the X, Y, and Z coordinates to place the object |
|
Center at Next Click |
Centers the subdivision object on the next mouse click in the drawing |
Set the parameters. If Center at Next Click is selected, click in the drawing to place the object.
The subdivision object is ready to be edited, using the Edit Subdivision tool.
Most tools and commands that can be used to edit solid objects can be used to modify subdivision objects.
|
Tools that don't edit subdivision objects |
|
|
Chamfer Edge Deform Extract Fillet Edge |
Push/Pull Shell Solid Taper Face |

