Cropping or splitting worksheet images
If you have a large worksheet image on a drawing that spans multiple pages, you can crop columns and rows, or split it into smaller images to fit as desired within the printing area. When you add, delete, or move columns and rows in the original worksheet, the worksheet images automatically adjust.
To create or edit a cropped image, click and drag a worksheet image's side and bottom edges as desired. There are also commands that allow you to quickly create a set of cropped linked images, or split an image into multiple cropped images. The menu on the bottom right corner of each image provides easy access to these and other commands.
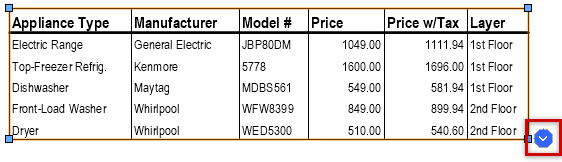
Click the button to open the worksheet image menu
Cropping columns
To crop columns from a worksheet image:
Select the worksheet image and move the cursor over the object's right or left edge to highlight it. Click and drag to preview the crop, then click again to apply the crop. You can crop columns from one or both sides of a worksheet image, as long as one column remains. A non-printing red vertical marker displays to indicate the crop. You can control when column crop markers display; see Vectorworks preferences: Worksheet pane.
To include the cropped columns elsewhere in your drawing, place a second instance of the worksheet image where desired, and crop out the columns that are shown in the first instance.
To restore cropped columns, click and drag the cropped edge past the crop marker, or select Remove Column Crop from the worksheet image menu.
Cropping rows and linking images
Crop rows from the full size worksheet image to create a smaller image of the desired length. You can then create a linked set of images that are all the same length as the first, and they automatically contain the next group of rows in the worksheet.
To crop rows from a worksheet image:
If desired, specify one or more rows to repeat as headings at the top of linked images. Open the worksheet, right-click the row number to repeat, and select Pin Row to Top of Worksheet Image. A small pushpin icon displays on the left side of the header cell for each pinned row.

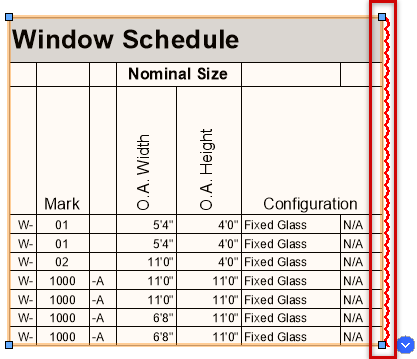
Select the worksheet image and move the cursor over the object's bottom edge to highlight it. Click and drag to preview the crop, and then click again to apply the crop. The image's menu button changes from blue to red, to indicate that the worksheet has overspill rows that aren't on the drawing.
To create the second section of the worksheet, select Create Linked Worksheet Image from the worksheet image menu. (Alternatively, click Create Linked Image on the Object Info palette.) A new worksheet image is created below the first image, showing the next group of rows from the worksheet.
The menu button on the first image changes to green, because the rows that follow it are now on the drawing. The menu button on the second image is red if there are remaining overspill rows, or green if all worksheet rows are now on the drawing.
If necessary, create additional linked images, until all worksheet rows are on the drawing. To quickly create the next image in the series, you can duplicate or copy and paste the last image you created. Place the images as desired anywhere in the file.
Duplicating or copying the first image in the series creates a new, unlinked copy of that image.
Visual cues for linked images
The following cues on linked images provide helpful information.
A blue link icon on the upper left of the image indicates that it's linked to a prior image. The first image in a series does not have a link icon. You can control when link icons display; see Vectorworks preferences: Worksheet pane.
If Display worksheet image numbers (non-print) is selected on the Object Info palette, each linked image displays a label indicating its position in the series.
If a linked image currently contains no rows, a "No Data" label displays.
When a linked image is selected, the other images in the series are highlighted in red.
The worksheet image menu button indicates the link status of the image as shown below. You can control when menu buttons display; see Vectorworks preferences: Worksheet pane.
 The Auto-expand last linked image option is selected on the Object Info palette, and this is the last (or only) image in the series. The image will automatically expand to reveal rows that have been added to the worksheet, or shrink to fit if rows are deleted.
 The Auto-expand last linked image option is deselected. If this is not the last image in the series, the rows that follow these rows in the worksheet are in another linked image on the drawing. If this is the last image in the series, this image shows all remaining rows from the worksheet.
 The rows that follow these rows in the worksheet are not in another linked image on the drawing.
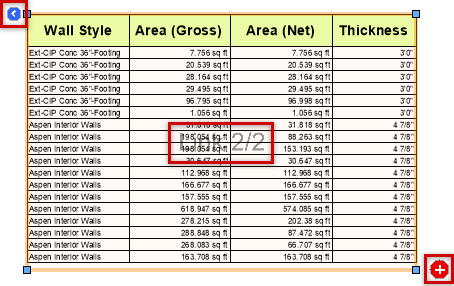
Link icon, image number, and red menu button on a linked worksheet image
Splitting images equally
|
Command |
Path |
|
Split Worksheet Image Equally |
Context menu |
To split a worksheet image into equal parts:
Right-click the worksheet image and select the command. Alternatively, select the command from the worksheet image menu.
When prompted, specify how many parts to split the worksheet into.
The image is split into the specified number of linked images, each containing the same number of rows (as much as possible).
Splitting images by clicking
|
Command |
Path |
|
Split Worksheet Image at Next Click |
Context menu |
To split a worksheet image by clicking:
Right-click the worksheet image and select the command. Alternatively, select the command from the worksheet image menu.
Move the cursor over the image to highlight the desired split location (between two rows, between two columns, or at the intersection of a row and column).
The image is split into smaller images as specified. If the split location was on a row, the images above and below the row are linked. Splits between columns are not linked.
Working with linked images
If you crop or split a worksheet image between rows, the images are linked. You can place the individual images of the worksheet anywhere in the file and easily access the next or previous image, or delete the whole set of linked images at once. If you add or remove column cropping on a linked image, all the images in the series are affected.
Linked image commands
Select a worksheet image and then select the command from the worksheet image menu, or right-click an image and select the command from the context menu.
Create Linked Worksheet Image: Creates a worksheet image based on the image selected; the new image automatically contains the next group of rows in the worksheet. If there are no more rows in the worksheet, the command creates an empty image with the label "No Data," which will display any future overspill rows.
Select Next Linked Image: Navigates to and selects the next worksheet image in the series.
Select Previous Linked Image: Navigates to and selects the preceding worksheet image in the series.
Unlink Worksheet Image: Unlinks the worksheet image from the series and creates a new unlinked image from the same worksheet. The remaining linked images automatically adjust to show the missing rows.
Delete Worksheet Image and All Linked Images: Deletes the selected image and all other images that are linked to it.
Object Info palette options
Buttons on the Object Info palette provide the same functionality as the linked image commands described above. Additionally, the following options are available; when applied to a linked image, all images in the series are updated.
Display worksheet image numbers (non-print): Adds non-printing sequential numbers to the linked images.
Auto-expand last linked image: If you add or delete worksheet rows, the last image in the linked series automatically adjusts its height to the number of rows.