 Creating a Custom Massing Model RoofCreating a Custom Massing Model Roof
If the standard flat or pitched massing model roof is not sufficient for portraying a more specific type of model, the roof geometry can be customized.

To create a custom massing model roof:
Create the massing model as described in Creating a Massing Model.
Select Use Custom Roof from Profile from the Object Info palette.
Select Modify > Edit Massing Model to enter roof profile editing mode.
In this mode, the roof can be selected and modified by standard editing methods used in the Vectorworks program; see Editing Objects. The Reshape tool can also be used.
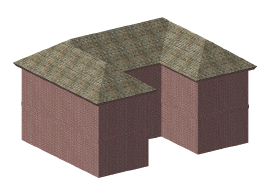
The first roof created by the object is used as the default custom roof; if the number of stories has changed, the height of the custom roof needs to be manually adjusted. A pitched roof is treated as a roof object; edit its parameters as described in Editing Roof Objects. Eaves can be changed to gables, for example.
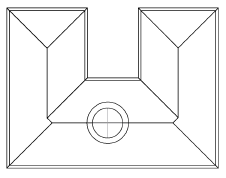
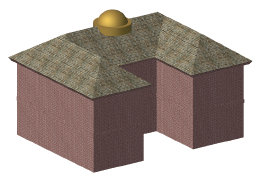
The geometry of a pitched roof can be further edited by selecting Modify > Edit Group and creating cut-outs; see Creating Cutouts in a Roof Object. Geometry can be added to the roof (a dome or cupola), or subtracted from the roof using 3D tools. Click the Exit Group button (or select Modify > Exit Group) to return to the roof profile editing mode.
Deleting the existing custom roof causes a copy of the current standard roof, pitched or flat, to be placed in the group when the group is exited.
When the roof edits have been made, click the Exit Profile button (or select Modify > Exit Profile) to return to the drawing.
Changes to the massing model may require manual updates to the custom roof; select the massing model and select Modify > Edit Massing Model to make any changes.
~~~~~~~~~~~~~~~~~~~~~~~~~
![]()