The appearance of worksheet cells can be set by a variety of formatting options.
Formatting applied to a database header row applies to all of the associated database sub-rows.
To format worksheet cells:
Select the cells to format.
From the Worksheet menu, select Format > Cells.
The Format Cells dialog box opens.
On the Number tab, set the number format for the selected cells.
Click to show/hide the parameters.
Click the Alignment tab to specify text alignment options.
Click to show/hide the parameters.
Click the Font tab to specify the font, font size, style, and color of text in selected cells. See Formatting Text.
Click the Border tab to set cell border formatting options.
Select the Line Attributes, and then use the Presets or Preview buttons to add or remove border elements.
Click to show/hide the parameters.
Click the Patterns tab to specify fill options for the selected cells.
Click to show/hide the parameters.
If Vectorworks Design Series is installed, click the Images tab to specify the type, size, view, and margin for images in the selected cells. For more information, see Inserting Images in Worksheets.
Click to show/hide the parameters.
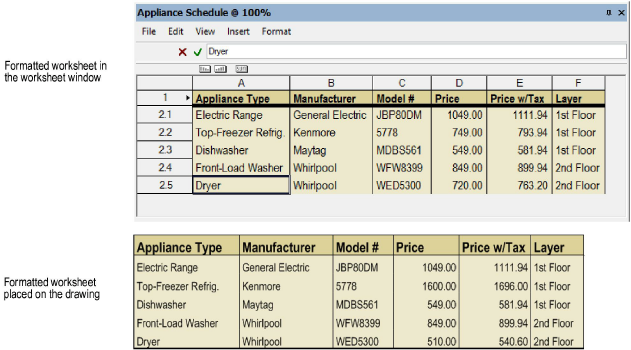
Click OK to set the formatting for the selected cells. The worksheet formatting also applies to worksheets placed on a drawing.
Click here for a video tip about this topic (Internet access required).
~~~~~~~~~~~~~~~~~~~~~~~~~
![]()