Editing Textures and Shaders from the Resource Manager
A texture and its shader properties can be edited from the Resource Manager. The texture does not have to be applied to any objects to be edited in this way; changes are displayed in a preview window rather than directly in the drawing.
Imported textures, such as those imported from Cinema 4D, display Imported as their color, reflectivity, transparency, and bump shader types, and Edit is disabled. However, you can select a different shader type and edit that, if desired. Other texture parameters are editable. Due to licensing restrictions, the texture reflectance of some Cinema 4D imported textures may not be an exact match to the original.
To edit a texture resource, including its shaders, from the Resource Manager:
-
From the Resource Manager, right-click (Windows) or Ctrl-click (Mac) on the resource, and select Edit from the context menu.
The Edit Texture dialog box opens.
-
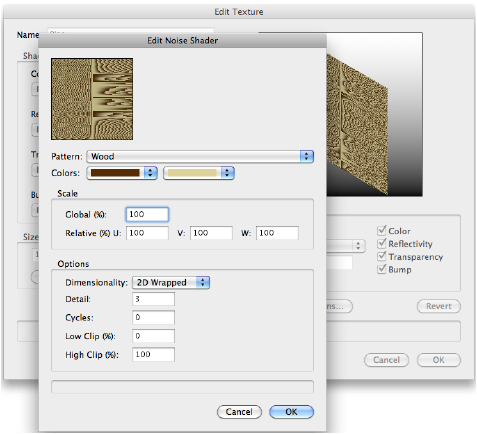
Click Edit to edit one of the shaders that make up the texture. The dialog box that opens depends on the shader. Descriptions of all the possible parameters are presented in alphabetical order in Renderworks Shader Types.
-
Click OK to exit the shader properties.
-
Edit the texture properties as described in Creating Textures. The texture can also be renamed.
The changes are displayed in the preview window.
-
Click OK to exit the Edit Texture dialog box. Textures applied to any objects are updated to reflect the changes.
A Renderworks texture can be deleted from a drawing and/or replaced with another existing Renderworks texture; see Deleting or Replacing Resources.
~~~~~~~~~~~~~~~~~~~~~~~~~
Editing Textures and Shaders of Selected Objects
Creating Textures
Renderworks Shader Types
Was
this page helpful?

vectorworks.net