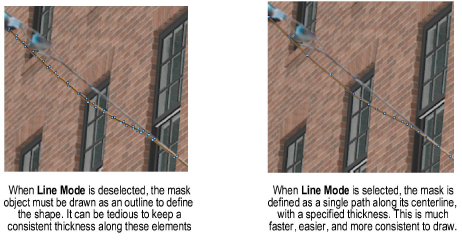
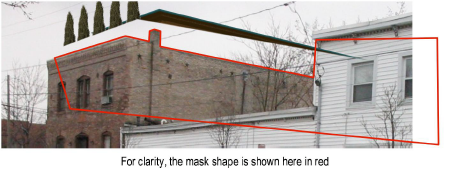
Masking can hide parts of a rendered model that should be behind objects in the photo image. While complex masking (for example, hiding many tree branches) may be best left to an image editing application, much can be done directly in the Vectorworks program using Camera Match masks. Masks also allow clones to be created, scaled, and rotated, for better blending.
While a mask object can be placed over the model in one step, it can be difficult to see the parts of the photo where you want the mask. However, you can first create a temporary mask object, allowing the desired parts of the photo to be seen.
Mode |
Description |
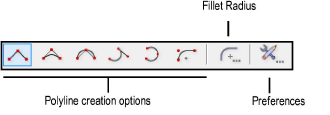
Polyline creation options |
Specifies the method for drawing the polyline shape for the mask |
Fillet Radius |
Sets the fillet radius when the Arc Vertex mode is selected |
Preferences |
Opens the object properties dialog box to set the default preferences for camera match masks |

To create a Camera Match mask:
Render the Camera Match view and crop the viewport if needed.
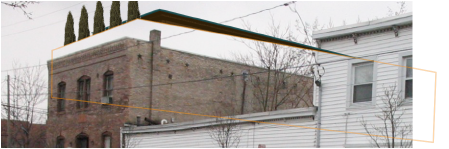
While in the viewport Edit Annotation mode, click the Camera Match Mask tool from the Visualization palette, and roughly draw a polyline object over the area of the model to be masked.
Once drawn, the mask object brings the parts of the photo that it contains to the front of the model. Now the parts of the photo that need to be worked on can be seen. This mask is temporary and is deleted after the final mask is placed.
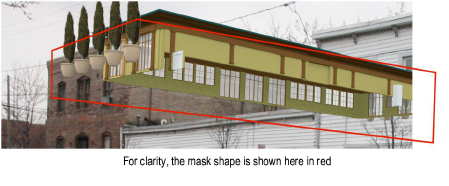
Using the Camera Match Mask tool, draw another polyline only over the parts of the photo that need to be in front of the model.
After drawing the polyline, the final Camera Match mask object is created. Delete the temporary mask and examine the results. If needed, double-click on the mask to enter Edit Point mode. While in this mode, individual points can be moved, added, or deleted.
The settings of a selected Camera Match mask can be edited from the Object Info palette.
Click to show/hide the parameters.

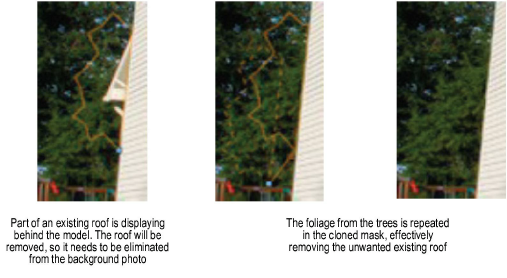
To clone an area with a Camera Match mask:
As previously described, use the Camera Match Mask tool to place a mask over the desired area for the cloned image.
Select the mask object. Select Clone Mode from the Object Info palette.
A handle is placed on the mask object.
When the mask object is selected, a dashed outline highlight also appears at the grip location. This indicates the area of the photo used for the clone.
Move the handle to an area in the image to clone; that part of the photo appears within the mask object.
~~~~~~~~~~~~~~~~~~~~~~~~~
![]()