
Individual wall peaks can be added with the Reshape tool.
The Fit Walls to Objects command automatically fits walls to selected geometry (Vectorworks Architect or Landmark required).
To add a wall peak:
In a 3D view, select the wall that requires a peak (vertex).
Click the Reshape tool from the Basic palette, and click Add 3D Wall Peaks mode.
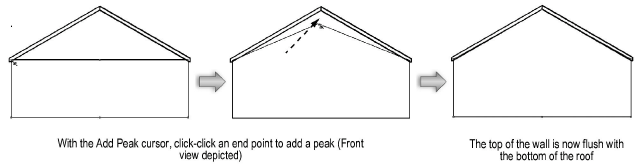
Position the cursor over an end point on one of the corners or an existing vertex, and click.
When the cursor is over an end point, the standard arrow cursor changes into a single-headed, filled arrow with shaded boxes on either side of the shaft.
Move the cursor to add a vertex to the top or bottom of the wall.
A vertex can be moved to any location along the same wall as long as the location does not pass another existing vertex.
Click when the vertex is at the desired location.
To reshape a curved wall to match a planar surface, use the Subtract Solids or Intersect Solids command with an object that matches the plane of the roof.
~~~~~~~~~~~~~~~~~~~~~~~~~