 Creating Barriers with the Rope
and Stanchion ToolCreating Barriers with the Rope
and Stanchion Tool
Creating Barriers with the Rope
and Stanchion ToolCreating Barriers with the Rope
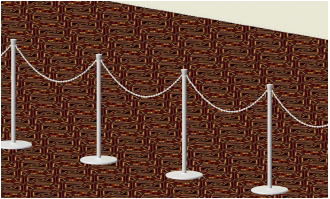
and Stanchion ToolThe Rope and Stanchion tool creates various types of barricades or roped-off areas for crowd control or for decorative purposes.

To insert a rope and stanchion barrier:
Click the Rope and Stanchion tool from the Spotlight tool set:
Click the appropriate mode in the Tool bar to select the creation method of the rope and stanchion object.
For more information on the polyline drawing modes, see Creating Polylines.
Click to set the object’s start point.
Click to set the end of the segment and the beginning of the next. Continue drawing segments in this manner until the rope and stanchion object is complete, and then double-click.
The first time you use the tool in a file, a properties dialog box opens. Set the default properties, and click OK.
Reshape the rope and stanchion polyline with the Reshape tool.
The rope and stanchion parameters can be edited from the Object Info palette.
Click to show/hide the parameters.
~~~~~~~~~~~~~~~~~~~~~~~~~
![]()