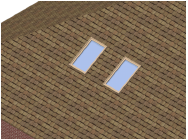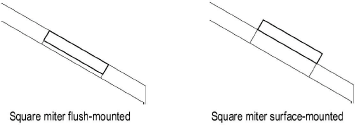

A full skylight, complete with a window symbol, can be placed in the roof object or roof face.
A 3D-only window symbol is required for creating a skylight. An existing hybrid symbol can be converted to a 3D symbol; place the symbol in the drawing and set its parameters, and then switch to a 3D view. Select the symbol, and then select Modify Convert > Convert to Group. Select the Convert all sub-objects option in the Convert to Group Options dialog box. With the group selected, choose Modify > Create Symbol to create a 3D symbol from the group, and select the On Edge option for Insert in Walls.
When creating your own skylight symbols, set the insertion point of the symbol at the back and center of the symbol.

The insertion point of the symbol determines whether a skylight will be flush or surface-mounted.

To insert a skylight:
From the Resource Manager, right-click (Windows) or Ctrl-click (Mac) on a 3D symbol to use in the skylight, and select Make Active from the context menu. The Symbol Insertion tool is automatically activated from the Basic palette.
Hybrid and 2D window symbols will not work for skylights, though hybrid symbols can be used to create a cutout.
Switch to Top/Plan view.
Click to place the symbol in the desired location in the roof object or roof face.
The Edit Roof Element dialog box opens.
Click Edit Skylight.
The skylight parameters are displayed.
Click to show/hide the parameters.
Click OK to create the skylight (or cutout).
~~~~~~~~~~~~~~~~~~~~~~~~~
