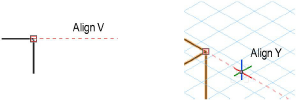
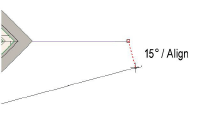
When smart points snapping is on, you can temporarily remember a point where the cursor paused for a set length of time, or where a special shortcut key was pressed. Once a smart point has been defined, you can align to it horizontally, vertically, or at a specific angle using extension lines and SmartCursor cues.
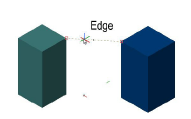
To set a smart point, pause the cursor over an object point for the set number of seconds, or press the T key. A small box displays when the smart point has been set.
A special smart point, called a datum, can be set to temporarily create a new origin for snapping and measuring purposes. The datum does not need to be set over an object, but can be placed anywhere. When a datum is set, all measurements along the X and Y axis are taken from that point, rather than the drawing’s origin, until the datum is moved or deactivated. When a datum is created, the Data bar displays coordinates relative to the datum, using the datum point as the origin. If a datum is set before moving an object with the Selection tool, the object’s location and angle are measured relative to the datum.
To set a datum point, pause the cursor for the set number of seconds, or press the G key. The datum displays as a small circle around the chosen point. See Data Bar and Edit Group Options to activate the floating Data bar automatically after a datum is set.
The SmartCursor remembers up to three smart points, and then the oldest points are replaced. A smart point or datum can be released by pausing the cursor or pressing the shortcut key over the point again.
Press the Esc key to clear all smart points.
A current snap is needed to acquire smart points, so enabling Snap to Object, at a minimum, is recommended.
To set smart point snapping:
Select Tools > SmartCursor Settings, or double-click the Smart Points tool in the Snapping palette.
The SmartCursor Settings dialog box opens. From the Smart Point tab, specify the smart point snap settings.
► Click to show/hide the parameters.
Click OK to set the smart point options.
To activate smart point snapping, click the Smart Points tool from the Snapping palette.
The appearance of the smart points can be changed; see Configuring Interactive Display. The shortcut key assigned to smart points and the datum can be customized; see Modifying Special Shortcuts.
► Click here for a video tip about this topic (internet access required).
~~~~~~~~~~~~~~~~~~~~~~~~~