 Marking Cable Measurements
 Marking Cable Measurements
To assist with creating cable layouts on site, distance measurements can be added to the drawing.
A specific distance can be marked from the start of any cable by entering a distance value.
To mark a specific distance on a cable:
Select the cable.
Select Spotlight > Cables > Mark Specific Distance.
The Enter Value dialog box opens.
Enter the distance value from the start of the cable to where the marker should be placed, and click OK.
If the cable travels vertically, confirm that you wish to include the vertical distance in the measurement. Then enter the vertical distance in the Enter Value dialog box and click OK.
The distance marker is placed on the drawing.

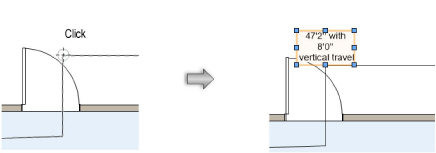
A label can be placed to mark the specific distance from the start of the cable to a point clicked on the cable.
To mark a clicked distance on a cable:
Select Spotlight > Cables > Get Distance Start to Click.
Click on the cable at the point where the measurement marker should be placed.
The Enter Value dialog box opens.
If the cable travels vertically, enter the vertical distance; otherwise enter 0 (zero).
Click OK.
The distance marker is placed on the drawing.

~~~~~~~~~~~~~~~~~~~~~~~~~