Applying Non-Associative Hatches
Command |
Path |
Hatch |
Modify |
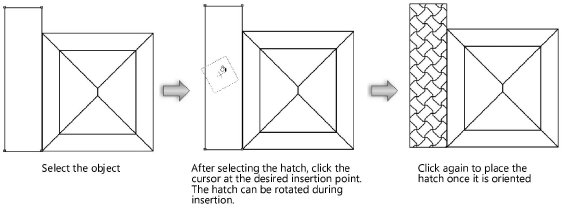
To apply a non-associative hatch:
Select
the object.
Select
the command.
The Hatches dialog box opens.

 Click
to show/hide the parameters.
Click
to show/hide the parameters.
Select
the hatch to apply from the Hatches list.
A preview of the hatch is displayed.
Click
OK to return to the drawing area.
The cursor changes to a paint bucket.
Position
the paint bucket on the object where the hatch should begin. Click
to specify the hatch origin. Drag to specify the hatch orientation
and click again.
The hatch fills the space from the paint
bucket’s location to the boundary created by the object.
When a hatch is being applied to an object,
the tip of the paint from the paint bucket marks the hatch origin. The
hatch start point within the object can be precisely specified.
~~~~~~~~~~~~~~~~~~~~~~~~~
Using Hatch Fills
Defining Hatches
Applying Associative Hatches
Editing Hatch Definitions
Was
this page helpful?