Inserting
grade objectsInserting
grade objects
Inserting
grade objectsInserting
grade objectsMode |
Tool |
Workspace: Tool set |
Insert
|
Grade
|
● Architect and Spotlight: Building Shell ● Landmark: Site Planning |
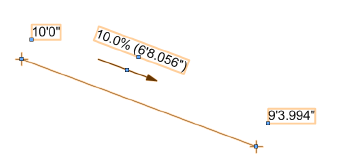
To insert a grade object:
1. Click the tool and mode.
2. Click to set the start of the grade. Move the cursor and click again to set the end point.
The Grade Settings dialog box opens. Click the Object Properties tab and enter the desired settings.
![]() Click
to show/hide the parameters.
Click
to show/hide the parameters.
Grade objects can be edited from the Object Info palette. Commonly-required parameters can be accessed directly from the Object Info palette, or click Settings to change any of the parameters of selected grade objects. Alternatively, edit the settings of a grade object by double-clicking on it, or right-click on a grade object and select Edit from the context menu.
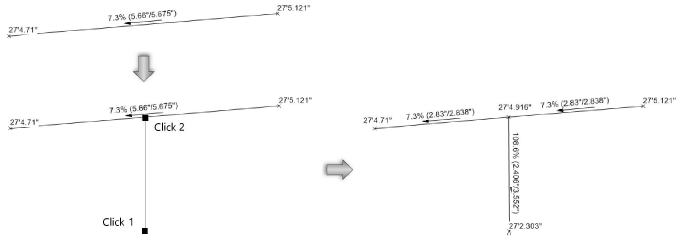
Grade objects can be used together, using an existing grade object as a reference for another grade object. Either move the endpoint of one grade object onto the line of another grade object, or create a new grade object with an end point on an existing grade object. The existing grade object is split at the new endpoint, creating a network of overlapping grade objects. The elevation of the shared point is interpolated from the slope of the existing object; if an elevation point is updated, all overlapping grade objects automatically update. Click Update mode from the Tool bar of the Grade tool to force an update of all overlapping grade objects.
|
Click here for a video tip about this topic (internet access required). |
~~~~~~~~~~~~~~~~~~~~~~~~~