 Creating wall end caps
The Wall End Cap tool creates both standard and custom component wrapping at the end of a standard wall. It has three modes:
|
Mode |
Description |
|
Component Wrap
|
Automatically wraps the selected component, creating a standard wall cap |
|
Add
|
Creates a custom wall end cap by adding |
|
Clip
|
Creates a custom wall end cap by removing |
|
|
Sets whether to create wall caps inside or outside the wall endpoint; also controlled by the Extend Cap Past Wall Endpoint option on the Object Info palette |


An End Cap in Wall object, while distinct from the wall, moves with the wall and adjusts if the wall is resized. The object can be dimensioned, reported in wall schedules, and exported as part of the wall. The wall cap uses the line weight of the source component, and its 3D geometry is of the same height as the source component.
Creating a standard wall end cap
|
Mode |
Tool |
Tool set |
|
Component Wrap
|
Wall End Cap
|
Building Shell |

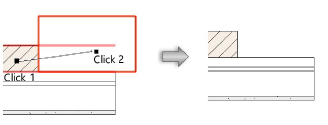
To create a standard end cap by wrapping a component:
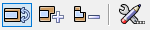
Click the tool and mode.
Click to select a component within the wall. This component wraps along the wall end.
Click to select the component where the wrapping should end.
The component wraps around the wall end to the end point.

Adding a custom wall end cap
|
Mode |
Tool |
Tool set |
|
Add
|
Wall End Cap
|
Building Shell |
To create a custom wall end cap by adding a shape to a component:
Create a 2D, closed shape to represent the wall end cap. The object must intersect the end of the wall.
Click the tool and mode.
Click to select a component within the wall. This component style is used to create the wall end cap.
Click to select the shape.
The shape is added to the component and the wall end, creating the custom wall cap.
Clipping to create a custom wall end cap
|
Mode |
Tool |
Tool set |
|
Clip
|
Wall End Cap
|
Building Shell |
To create a custom end cap by clipping a shape from a component:
Create a 2D, closed shape to represent the wall end cap. The object must intersect the end of the wall.
Click the tool and mode.
Click to select a component within the wall. This component style is used to create the wall end cap.
Click to select the shape.
The shape is subtracted from the component, creating the custom wall cap.
