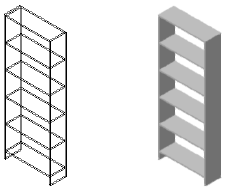
 Inserting shelving units
|
Mode |
Tool |
Workspace: Tool set |
|
Modes for The Symbol Insertion tool |
Shelving Unit
|
Architect and Spotlight: Furn/Fixtures Landmark: Building Shell |
The Shelving Unit tool provides access to a variety of standard configurations available from the Resource Manager, in addition to individual objects created using the tool. The tool can be used to create your own style resources (see Concept: Plug-in object styles).
In addition to these common shelving units, Vectorworks offers the flexibility of creating custom cabinets (see Creating custom cabinets).

To insert a shelving unit:
Click the tool and mode.
Do one of the following:
Click Shelving Unit Style on the Tool bar to select a resource from the Resource Selector.
Click Preferences to open the object properties dialog box and specify the tool’s default parameters.
The parameters can be edited later from the Object Info palette.
Click to show/hide the parameters.Click to show/hide the parameters.
|
Parameter |
Description |
|
Style |
Replace, remove, or edit the current style, or create a new plug-in object style for this object. Editing a style changes all instances in the file that use the style. |
|
Hide Style Parameters |
Hides the parameters that are set by style; these cannot be edited from the dialog box or Object Info palette |
|
Flip |
If the object is in a wall, click to flip the object orientation |
|
Set Position |
If the object is in a wall, click to activate the Move by Points tool in Reference Point mode and move the object by a specified distance from a reference point |
|
Type |
Select the unit type |
|
Config |
Select the unit configuration |
|
Height/Width/Depth |
Enter the unit’s height, width, and depth |
|
Bottom |
Enter the height of the bottom shelf |
|
Shelves |
Enter the number of shelves; the shelves are spaced evenly between the bottom shelf and the top of the unit |
|
Thickness |
Enter the thickness of the cabinet material |
|
Back |
Encloses the back of the unit |
|
Back Finish/Shelf Finish/Bracket Finish |
To control appearance and visibility, select a class for each component from the list of classes present in the drawing, or create a new class. Select <Shelving Unit Class> to place the component attributes in the same class as the shelving unit object. |
|
Facing Board |
For straight units, select whether to add a facing board |
|
Board Offset |
Enter the size of the facing board offset from the front of the unit |
Click on the drawing to place the object, and click again to set the rotation.
Optionally, create a style resource from the object (see Standard plug-in object styles without catalog options).

