Hidden line rendering with surface hatches
|
Command |
Path |
View bar |
|
Line Render Options |
View > Rendering |
|
In hidden line render mode, it is possible to produce monochromatic conceptual or production drawings by displaying planar hatches wherever a textured surface would exist in a raster-rendering mode. It is also possible to create 2D components of symbols and some plug-in objects to display in a viewport in lieu of 3D components that do not create the desired appearance; see Concept: 2D components for symbol definitions and plug-in objects.

Surface hatches are an aspect or feature of a texture; they can be used when associated with the texture that is applied to an object. Some of the most commonly used Renderworks standard textures are pre-associated with an appropriate hatch, but the surface hatches can be associated with other textures, changed, and settings can be edited.
Most of the textures with pre-associated surface hatches are construction textures that would be applied to building external surfaces, such as brickwork, CMU, concrete, corrugated metal, etc. They are easily identifiable in texture libraries by the text <Surf Hatch> in the resource name.
If a hatch that is associated with one or more textures is deleted from the Resource Manager, all textures associated with that hatch have their hatch association set to None.
To display surface hatches on a design layer using an existing hatch and texture association:
Select the command.
Alternatively, if a different render mode is active, select the command under Options For Other Render Modes in the Current Render Mode menu on the View bar.
The Line Render Options dialog box opens.
Select Display Surface Hatches.
To display surface hatches in a viewport using an existing hatch and texture association:
On the viewport’s Object Info palette Shape tab, set Background Render and/or Foreground Render to Hidden Line.
Click Background/Foreground Render Settings to open the Hidden Line Render Settings dialog box.
Select Display Surface Hatches.
Editing surface hatches
To associate a hatch with a texture or to edit an existing hatch and texture association:
From the Resource Manager, right-click on the texture, and select Edit from the context menu.
The Edit Texture dialog box opens.
Surface Hatch displays the name of the surface hatch resource associated with the texture, if any. To associate a new hatch or align and register the existing hatch with the texture, select Edit Surface Hatch.
The Edit Surface Hatch dialog box opens.
To navigate directly to the Edit Surface Hatch dialog box without opening the Edit Texture dialog box, select Edit Surface Hatch from the Texture menu to the right of the Texture list on the Object Info palette Render tab.
Hatches defined with page units cannot be aligned to a texture; therefore the alignment fields are grayed in the Edit Surface Hatch dialog box.
Click to show/hide the parameters.Click to show/hide the parameters.
|
Parameter |
Description |
|
Surface Hatch |
Select Hatch to associate a surface hatch with the texture. If using a surface hatch, click the hatch selector. From the Resource Selector, double-click a hatch to apply it. |
|
Set Hatch Alignment |
|
|
X/Y Offset |
Sets the horizontal/vertical surface hatch offset relative to the texture |
|
I/J Length |
Sets the horizontal/vertical repeat distance relative to the hatch definition (I in the red direction and J in the green direction) |
|
Link button
|
Maintains the aspect ratio of the hatch when changing the I and J lengths |
|
Rotation |
Sets the degree of rotation from horizontal relative to the texture |
|
Flip Horizontally/Vertically |
Flips the surface hatch horizontally/vertically relative to the texture |
|
Reset |
Reset surface hatch alignment settings |
|
Preview |
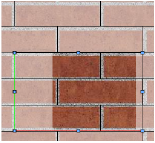
Displays a hatch alignment frame over an image of the texture; control points can be moved for manual adjustment of rotation, length, location, and registration
|
|
Preview Controls |
Adjusts the preview position and magnification. Click Pan and drag the texture preview to the desired location. Click Zoom In or Zoom Out and then click and drag to create a marquee; this zooms in or out on a particular section of the preview. Click Fit to fit the preview to the window (according to Texture Size). |
|
Texture Size |
Sets the texture size. This field corresponds to the Size parameter in the Edit Texture dialog box; changes in one location affects the other. |
Set the desired parameters to align and register the hatch with the texture.
As part of a texture, surface hatches can be applied to an object by class; see Concept: Applying textures by class.


