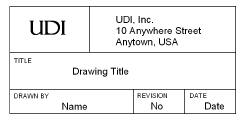
In a new file with a scale of 1:1, create the elements of the title block, including lines, rectangles, graphics, and text. Creating the title block at a scale of 1:1 ensures that it is inserted at the correct scale when it is placed on a sheet layer or a design layer of any scale. The title block should be a 2D screen object (See Planar Modes of 2D Objects: Screen Plane and Layer Plane.)
● Do not use any 3D elements.
● Company logos can be imported as bitmaps.
● The title block geometry (pen color, pen style, and line thickness) and text (font, style, and color) can either inherit the sheet border attributes, or retain those attributes as created. The “By Class” setting in the Attributes palette indicates that the attributes should be inherited from the sheet border. If an attribute is not set to “By Class,” then its original setting is retained.
Description |
Method |
|
The attributes of the title block elements are inherited from the sheet border |
Specify “By Class” in the Attributes palette for these elements. For text font and style attributes, set the Pen Style by class to use the same font and style as the sheet border. For text color, set the Pen Color to “Color By Class.” |
|
The title block elements retain the attributes as created |
Set the attributes of the geometry and text from the Attributes palette when the title block is created. For text font and style attributes, set the Pen Style to Solid to use the text attributes set when the title block was created. For text color, select the desired Pen Color. |
Different settings can be combined so that some attributes are inherited from the sheet border, while others remain as created. For example, if a line should use the same color as the sheet border, but have a dashed line type with a thickness of 1 mm, when creating the line, set the line’s Pen Color to “Color By Class,” its Line Thickness to 1 mm, and its Pen Style to the desired dashed line type.
Select all the title block elements, and then select Modify > Create Symbol.
The insertion point of the symbol should be at lower right corner of the title block. See Creating Symbol Definitions.
Create a new record format as described in Creating Record Formats.
The field names of the record format are used as the titles for the associated editable fields in the Edit Title Block dialog box.
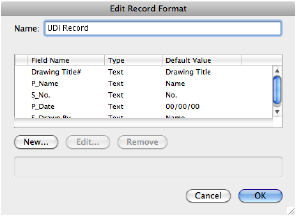
To create a multi-line field, append a pound sign (#) to the field name, as in Drawing Title#.
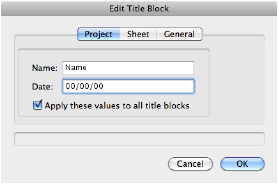
Use a P_ prefix to indicate project fields (these are fields with the same value on all title blocks in the file). An S_ prefix indicates sheet fields (these are fields with a different value on any title blocks). The prefixes cause the Edit Title Block dialog box, accessed from the Object Info palette, to be separated into project and sheet tabs. Fields without a prefix are placed on the General tab.
Use an _SN suffix to indicate that a field should gets its value from the Sheet Number of its sheet layer. If Use Automatic Drawing Coordination is enabled in document preferences (Vectorworks Design Series required), the _SN suffix also means that when this title block field is updated, the Sheet Number of the sheet layer and of annotation objects on the layer are updated.
Use an _SD suffix to indicate that the field should get its value from the Sheet Title of its sheet layer. If Use Automatic Drawing Coordination is enabled in document preferences (Vectorworks Design Series required), the _SD suffix also means that when this title block field is updated, the Sheet Title of the sheet layer is updated. If the field should also be multi-line, use an _SD# suffix.
Creating a custom title block in the Vectorworks Design Series products requires additional steps, if the custom title block is to be used with the Issue Manager (see The Issue Manager), or contain issue fields or revision fields. When creating the record format to attach to the custom title block, fields linked to the Issue Manager require special prefixes or suffixes. If creating issue or revision fields, special text strings are added to the title block design. These record fields do not require linking, as they are automatically recognized by the Vectorworks program.
Title Block Area |
Prefix Required |
|
Issue Manager |
If you are creating a US Arch-style title block with issue data linked to the Issue Manager: ● Project fields (which contain the same value in all drawing set title blocks) must be prefaced with P_ (example: P_Project Title) ● Sheet fields (which contain different values in different drawing set title blocks) must be prefaced with S_ (example: S_Sheet Scale) ● Multi-line text fields (which contain multiple lines of text) must be appended with a # (pound sign) (example: P_Drawing Title#) |
|
Issue Data |
To add issue fields, such as issue number, date, note, and/or approvals to a sheet border which can be populated by the Issue Manager and edited manually, create text fields with special text strings to represent the issue fields and place these fields in the title block. The special text strings are (including colon): ● Issue note :iNote ● Issue number :iNo ● Issue date :iDate ● Issue approval :iAppr The text fields can have any justification, and should have word wrap on. The vertical alignment must be set to Top for the issue text to flow down, and to Bottom for the issue text to flow up. To enter or edit issue text, click Edit Issue Data from the Object Info palette of a selected sheet border (see Editing Issue Data), or use the Issue Manager. The issue history is a property of the sheet border, not the title block, so a title block is not required to enter issue data. |
|
Revision Data |
To add revision fields, such as revision number, date, zone, and/or approvals to a sheet border, create text fields with special text strings to represent the revisions and place these fields in the title block. The special text strings are (including colon): ● Revision note :rNote ● Revision number :rNo ● Revision date :rDate ● Revision zone :rZone ● Revision approval :rAppr The text fields can have any justification, and should have word wrap on. The vertical alignment must be set to Top for the revision text to flow down, and to Bottom for the revision text to flow up. To add revision text to a sheet border, select Use Revision Block from the Object Info palette of a selected sheet border. To enter or edit the revision text, click Edit Revision Data (see Editing Revision Block Data). The revision history is a property of the sheet border, not the title block, so a title block is not required to enter revision data. |
Attach the custom record format to the title block symbol through the Resource Manager as described in Attaching Record Formats to a Symbol Instance or Object.
Edit the title block symbol and attach the record fields to the associated symbol text; see Linking Text to Record Formats for more information.
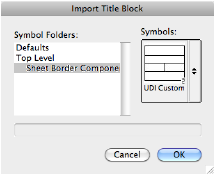
To make the symbol available to the Sheet Border tool, save the file in the Sheet Border - Title Blocks folder in your user folder ([User]\Libraries\Defaults).
To place the custom title block, click Title Block from the Object Info palette of a selected sheet border, and select the custom title block symbol.