 Creating Automatically Bounded Slabs from Existing Walls
 Creating Automatically Bounded Slabs from Existing Walls
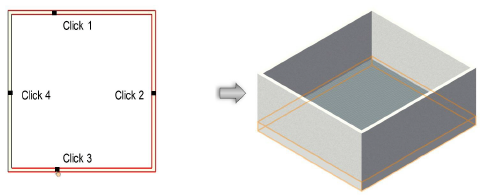
Slabs can be automatically created by first selecting the enclosing walls or by clicking within the boundary of a closed set of visible walls. The slabs are automatically associated with their bounding walls.
Use classes to distinguish interior and exterior walls to easily place slabs associated with the correct wall set.
Every slab contains a component designated as the datum component. The top or bottom of this component is the Z-reference datum, and is fixed vertically (it does not change with any changes to the slab thickness or definition). The reference datum of the slab can be set to the active layer elevation value, or set to be bound by one of the story levels defined for the story or the story below it. By setting the slab datum to a level type, if the elevation of the associated story changes, the datum of the slab changes automatically to match.
The slab edge path is defined by the outside or inside face of the walls, or by components within the wall, as defined by the slab component properties. If the walls are edited (whether moved, reshaped, or replaced, or due to a change in the wall style, the wall thickness, or the wall components), the slab edge path updates automatically. However, if the walls are edited so significantly that the slab cannot retain its association, you have the option to create a manual slab from the automatically bounded slab.
Because the walls and slab are associated, section views display accurately. When creating a section view, similar component fills can be merged to display as a single unit (see Advanced Sheet Layer Viewport Properties).
Once an automatically bounded slab is created, it can be moved to another layer and still retain its association with the walls.

To create an automatically bounded slab within a selected set of visible walls:
Click the Slab tool from the Building Shell tool set, and select Picked Walls mode from the Tool bar.
Select the desired slab style from the Slab Style list on the Tool bar. To draw an unstyled slab select <Unstyled> from the Current Document file on the list. If the desired slab style has already been created, select it from the list or double-click the resource in the Resource Browser. Create a new slab style by clicking Preferences from the Tool bar; see Creating Slab Styles.
On the Slab Style list, the files and folders available in the current document, in other open documents, and in the libraries are listed on the left. Select a file to display thumbnails of the slab styles available in that location, and select the desired style.
Click each wall that forms the wall set and press Enter, or click the check mark button on the Tool bar.
The slab is created.


To create a slab within a closed set of visible walls:
Click the Slab tool from the Building Shell tool set, and select Inner Boundary mode from the Tool bar.
Select the desired slab style from the Slab Style list on the Tool bar. To draw an unstyled slab select <Unstyled> from the Current Document file on the list. If the desired slab style has already been created, select it from the list or double-click the resource in the Resource Browser. Create a new slab style by clicking Preferences from the Tool bar; see Creating Slab Styles.
On the Slab Style list, the files and folders available in the current document, in other open documents, and in the libraries are listed on the left. Select a file to display thumbnails of the slab styles available in that location, and select the desired style.
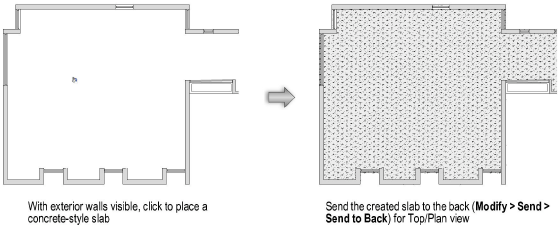
Click in an open area of the drawing that is bounded by walls; the walls must be visible, joined together, and on layers that have the same layer scale as the slab layer.
The slab is created.

Click here for a video tip about this topic (Internet access required).
~~~~~~~~~~~~~~~~~~~~~~~~~
