Placing Drip Outlets
Placing Drip OutletsThe Drip Outlet tool places an irrigation drip outlet—linear drip lines, or rows of drip lines within a defined area, which allow water to seep out. (This is different from the drip tubing type of the pipe object, which does not leak water; it transfers the water to drip emitters along its length.) The parameters for the drip outlet come from a selected manufacturer or can be placed as a custom drip outlet with parameters that can be specified after placement.
A drip outlet added to a pipe splits the existing pipe in two.
The following modes are available:

Mode |
Description |
Insert |
Inserts a drip outlet according to the selected placement mode |
Pickup |
Sets the default drip outlet settings to match those of a selected existing drip outlet; see Transferring Outlet Attributes |
Mass Creation |
Places drip outlets over a valid irrigation object (pipe or polyline) by clicking on it; see Transferring Outlet Attributes |
Outlet |
Opens the Resource Selector to select a drip outlet resource for placement; double-click a resource to select it. Select from one of the manufacturer libraries, or select the custom drip outlet from Custom.vwx and set its properties after placement. |
Drip Line |
Creates a drip line along the drawn polyline |
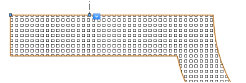
Drip Area |
Creates an area with rows of drip lines |
Polyline creation options |
Selects the method for drawing the polyline upon which the object is based; see Creating Polylines |
Preferences |
Sets the default preferences for the drip outlet object |

To place drip outlets on the drawing:
Click the Drip Outlet tool from the Irrigation tool set and click Insert mode from the Tool bar. Click Outlet on the Tool bar. From the Resource Selector, double-click a resource to activate it. Select from one of the manufacturer libraries, or select the custom outlet from Custom.vwx and set its properties after placement.
Click the appropriate mode from the Tool bar to specify the creation method of the drip outlet object.
Click Preferences from the Tool bar.
The Object Properties dialog box opens. Select the default drip outlet settings. The Drip Outlet tool uses these preferences until they are changed again, or until Pickup mode is selected, which changes the settings to those of a selected existing drip outlet.
► Click to show/hide the parameters.
Click OK.
Click once to set the drip outlet location. If placing the drip outlet over an existing pipe or irrigation pipe network, the connecting pipe is highlighted and the drip outlet is automatically connected to the network.
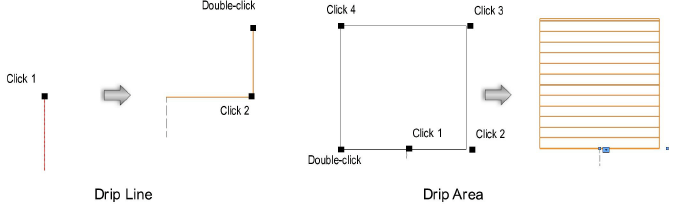
● For drip outlets placed in Drip Line mode, draw the drip line polyline, clicking at each vertex. Double-click to finish drawing the drip line. Only the start end of a drip line can be connected to an existing pipe.
● For drip outlets placed in Drip Area mode, draw the outline of the drip line area, clicking at each vertex. Double-click to finish drawing the drip line area.
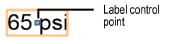
Adjust the position of any pressure and flow labels by dragging the label control point.
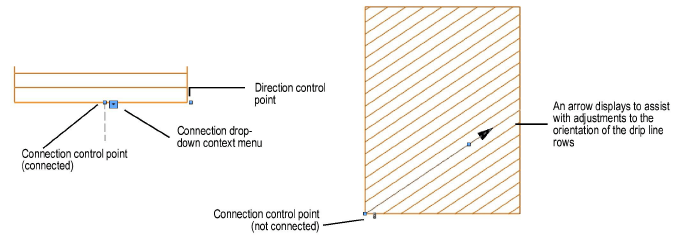
Adjust the orientation of the drip line rows in a drip area by dragging its control point. The connection point also has a control point; when the drip line area is not connected to a network, the connection point is indicated by a chain link image.
For a different style of drip area display, deselect the Show Drip Lines parameter and use a fill (such as a hatch) selected from the Attributes palette.
The drip outlet properties can be edited from the Object Info palette.
► Click to show/hide the parameters.
~~~~~~~~~~~~~~~~~~~~~~~~~